Welcome to WordPress. This is your first post. Edit or delete it, then start writing!
Blog
-
Top 100 Lab Equipment List and Their Uses
100 Lab Equipment List and Uses
This comprehensive guide includes 100 laboratory products, systematically organized into 10 major equipment categories. Each category features 10 essential laboratory instruments, clearly defined with concise, practical descriptions.
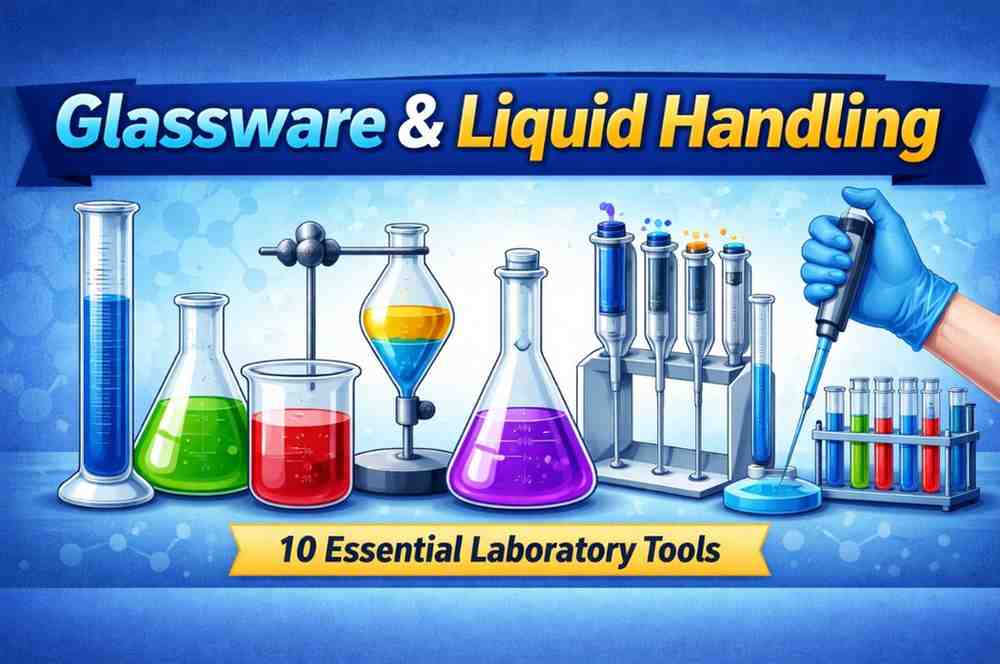
1-10 Glassware & Liquid Handling

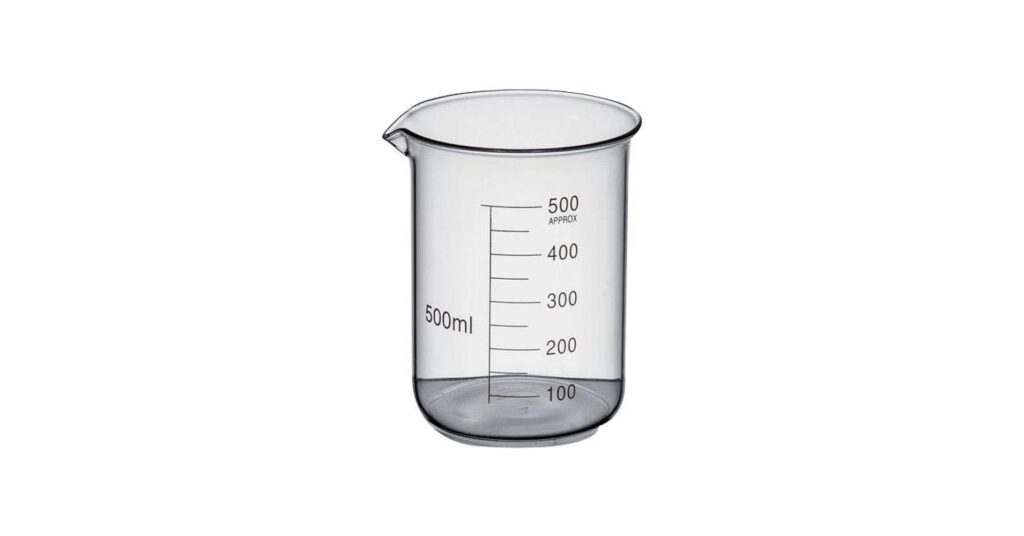
- Beaker – Holds mixes heats liquids for reactions rough volume measurement purposes
- Erlenmeyer Flask – Allows spillfree swirling mixing titration microbial culture preparation in laboratories
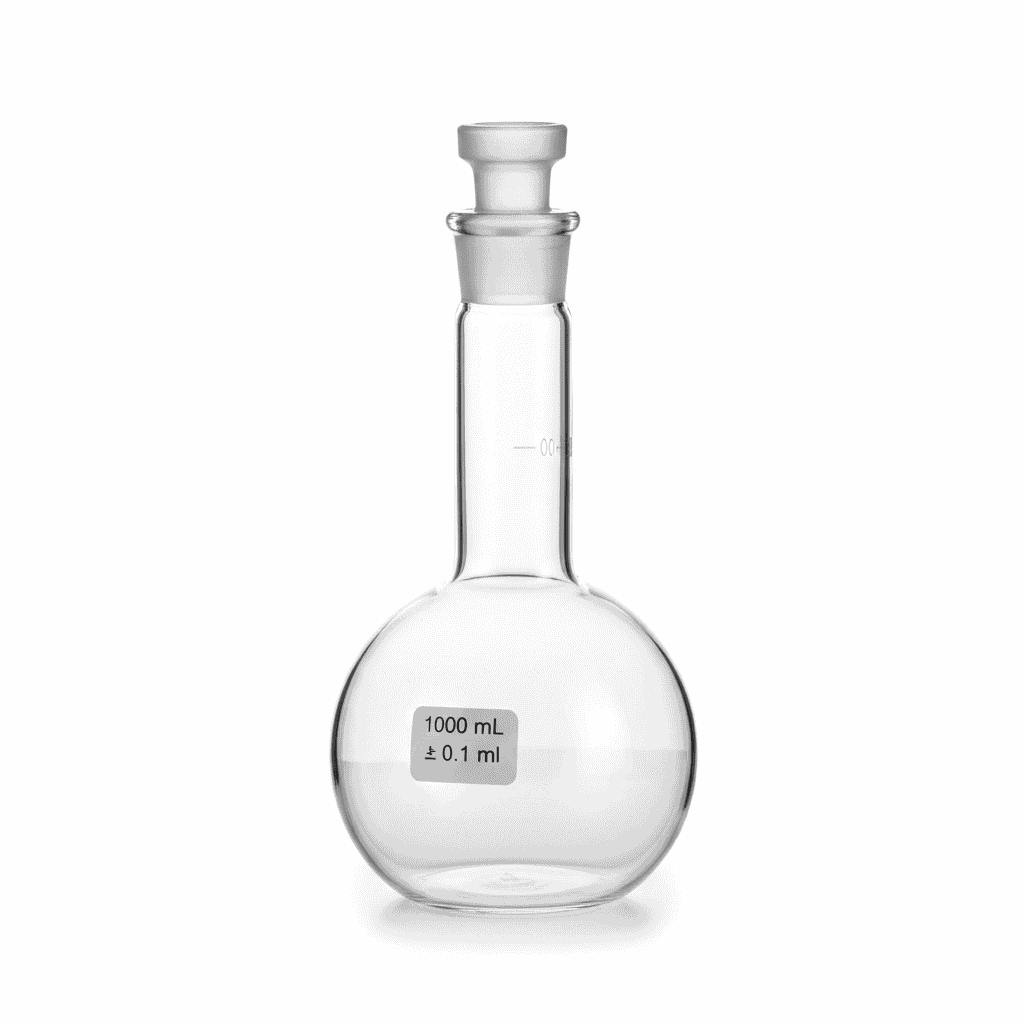
- Volumetric Flask – Prepares solutions of exact concentration with extremely high volume accuracy
- Graduated Cylinder – Measures liquid volumes more accurately than beakers during experiments
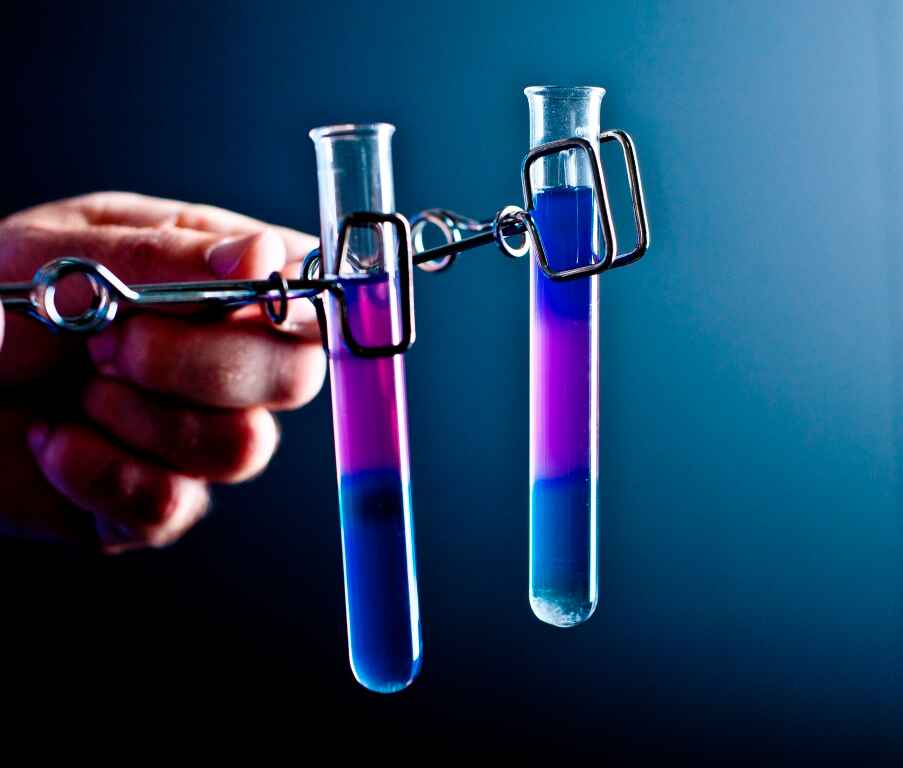
- Test Tube – Holds small samples for reactions heating testing centrifugation purposes
- Volumetric Pipette – Transfers single fixed liquid volume with very high precision
- Micropipette – Transfers microliter volumes accurately in molecular biology laboratories
- Burette – Dispenses liquids precisely during titration and quantitative chemical analysis
- Glass Funnel – Transfers liquids safely and supports filtration using filter paper
- Separatory Funnel – Separates immiscible liquids based on density differences effectively
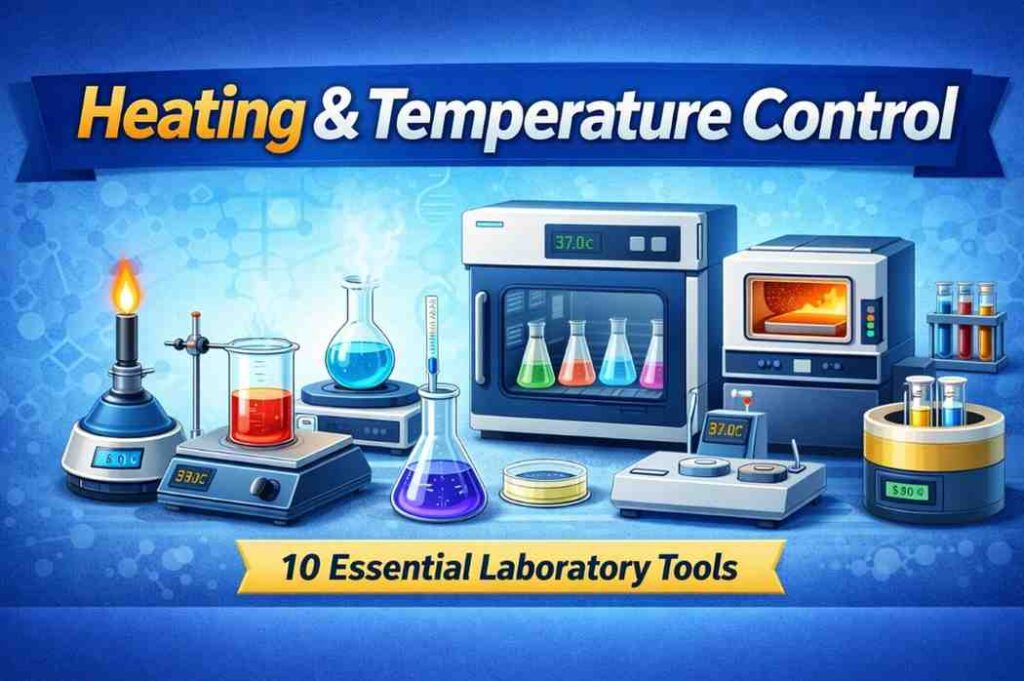
10-20 Heating & Temperature Control
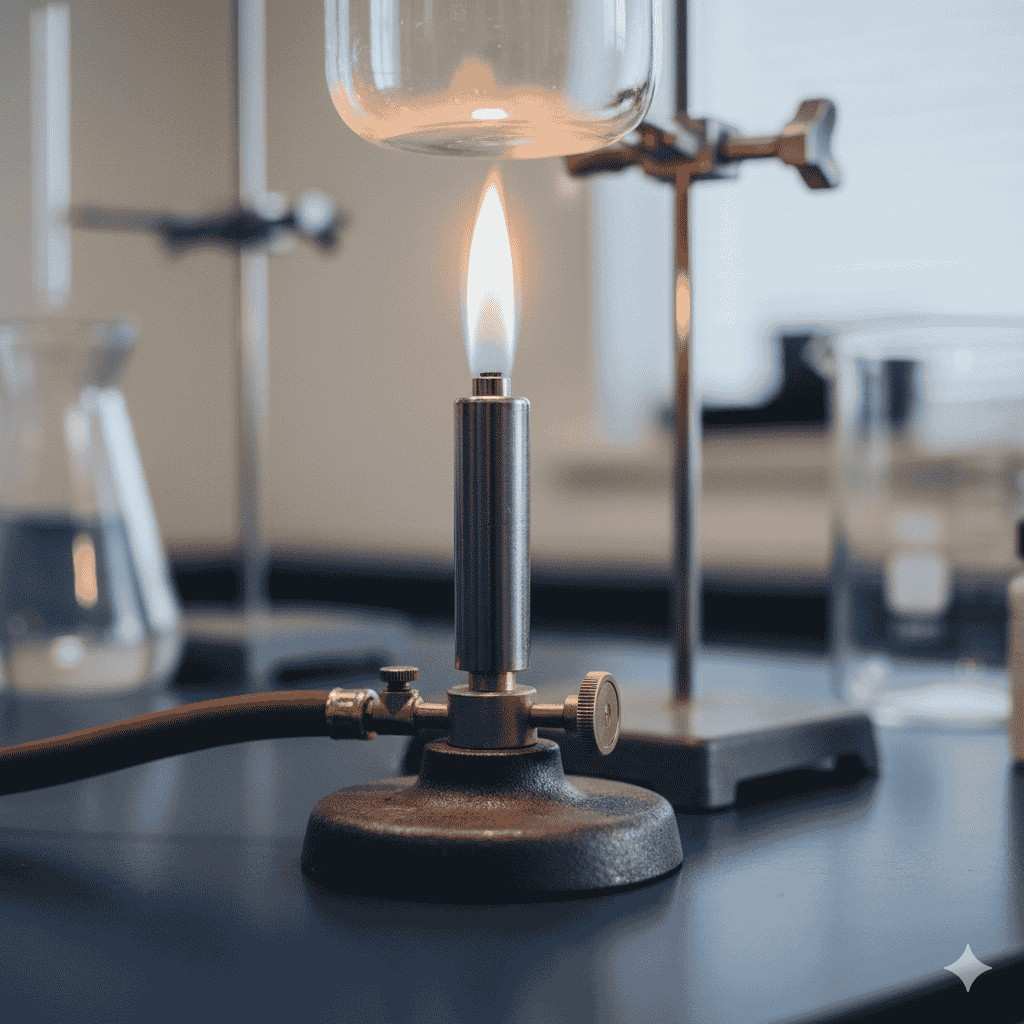
- Bunsen Burner – Provides direct flame for heating sterilization and combustion experiments
- Hot Plate – Heats chemicals safely without open flame for laboratory use
- Magnetic Stirrer Hot Plate – Simultaneously heats and stirs solutions using magnetic stir bar
- Heating Mantle – Uniformly heats round bottom flasks safely without flame
- Water Bath – Gently heats samples at controlled constant temperatures uniformly
- Oil Bath – Provides higher temperature heating compared to standard water baths
- Dry Bath – Heats tubes uniformly using solid metal heating blocks
- Incubator – Maintains constant temperature for microbial growth and sample incubation
- Shaking Incubator – Incubates samples while continuously shaking for proper aeration
- Muffle Furnace – Performs high temperature heating ashing and material testing
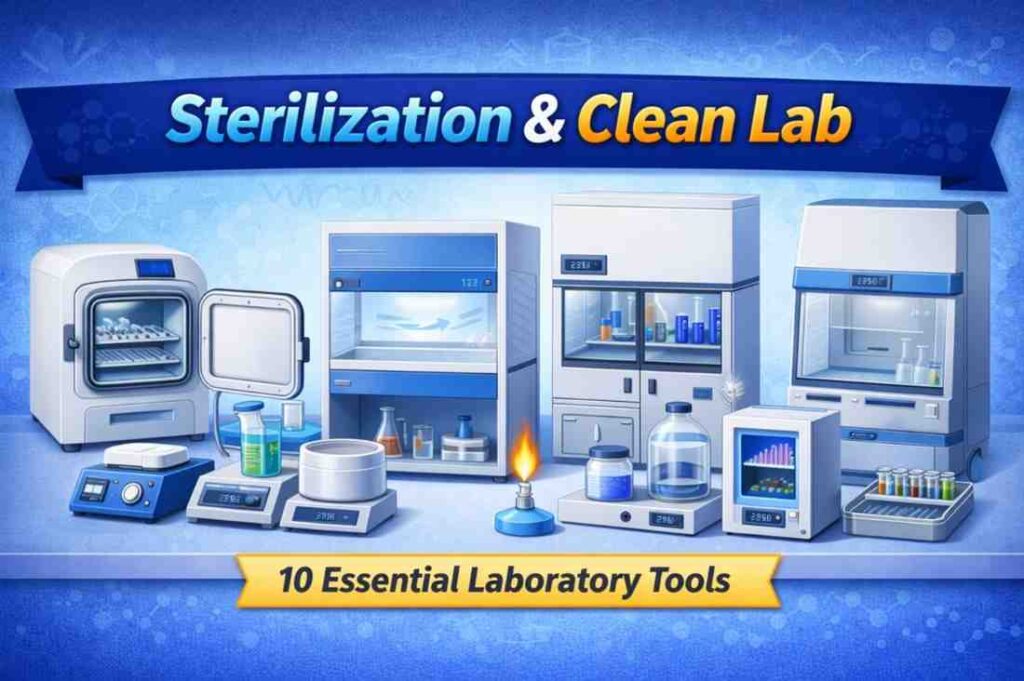
20-30 Sterilization & Clean Lab
- Autoclave – Sterilizes instruments media using high pressure saturated steam
- Laminar Flow Hood – Provides sterile airflow environment preventing contamination during work
- Fume Hood – Removes hazardous fumes protecting users during chemical handling
- UV Sterilization Cabinet – Sterilizes tools surfaces using ultraviolet radiation exposure
- Anaerobic Jar – Creates oxygen free conditions for anaerobic bacterial culture
- Desiccator – Stores moisture sensitive samples in controlled dry environment
- Hot Air Oven – Sterilizes glassware using dry heat at high temperatures
- Biosafety Cabinet – Protects user sample and environment from biohazards
- Alcohol Burner – Provides small flame for quick sterilization tasks
- Sterilization Tray – Organizes instruments during sterilization and laboratory procedures
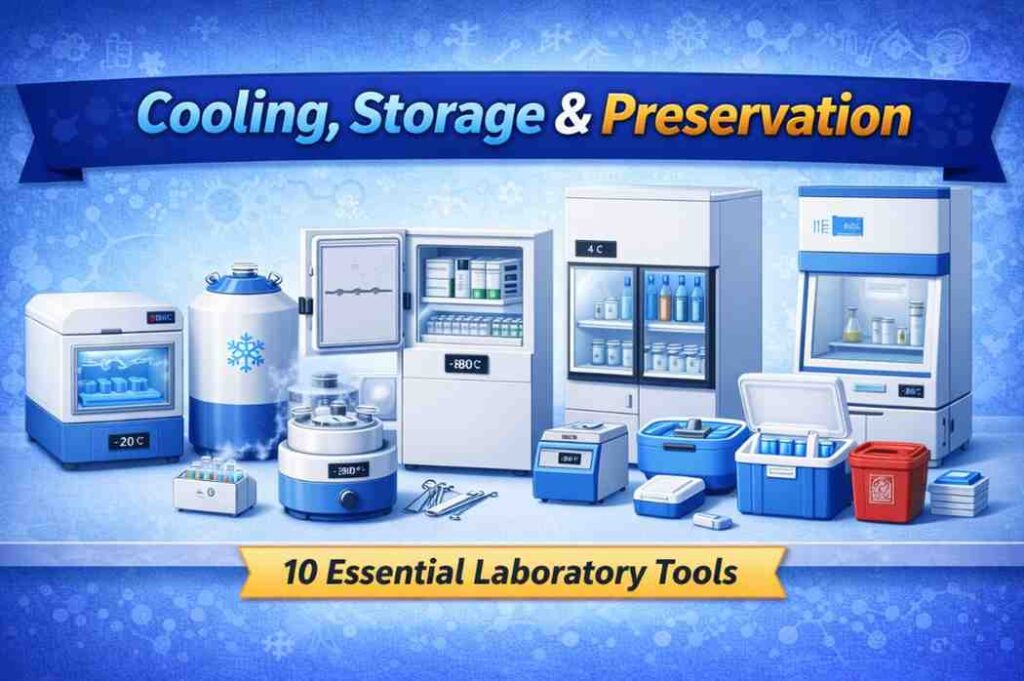
30-40 Cooling, Storage & Preservation
- Laboratory Refrigerator – Stores chemicals samples safely at controlled low temperatures
- Deep Freezer – Preserves biological samples reagents at minus twenty degrees
- Ultra Low Freezer – Stores DNA enzymes samples long term at extreme cold
- Cryogenic Freezer – Preserves samples using liquid nitrogen ultra cold temperatures
- Cryovials – Securely store biological samples at ultra low temperatures
- Ice Bath – Provides rapid cooling for temperature sensitive reactions
- Cold Room – Maintains low temperature workspace for sensitive experiments
- Sample Storage Rack – Organizes samples systematically for easy identification retrieval
- Vaccine Refrigerator – Stores vaccines maintaining required temperature stability continuously
- Cooling Circulator – Controls temperature of instruments during experimental operations
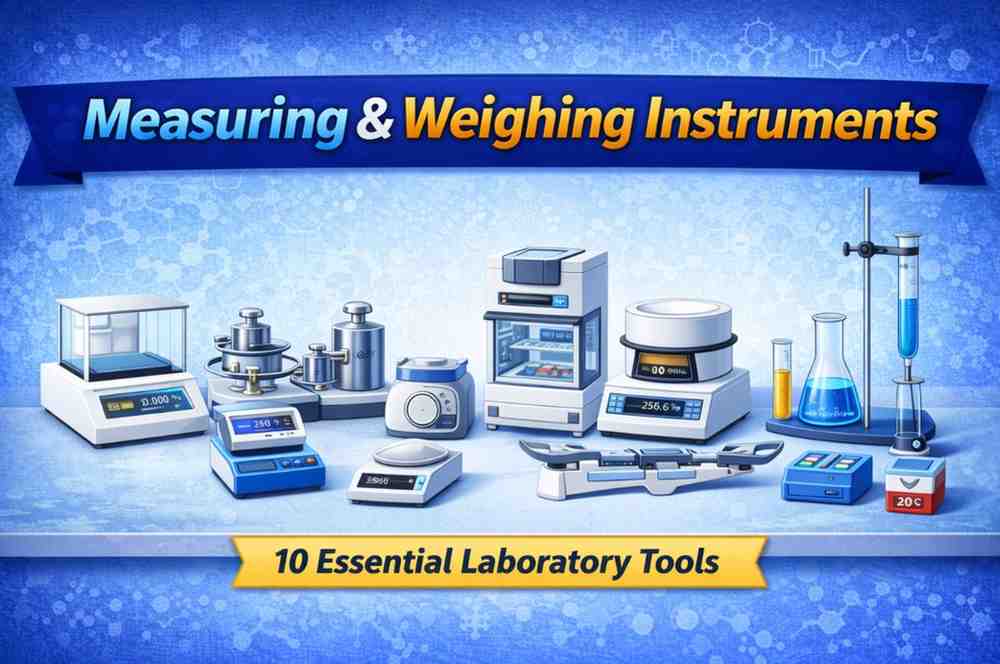
40-50 Measuring & Weighing Instruments
- Analytical Balance – Measures mass with extremely high precision and accuracy
- Top Loading Balance – Performs routine weighing tasks quickly with moderate accuracy
- pH Meter – Measures acidity alkalinity levels of liquid solutions accurately
- Conductivity Meter – Determines ionic concentration through electrical conductivity measurement
- Thermometer – Measures temperature of samples reactions and environments
- Digital Temperature Probe – Monitors temperature continuously with fast digital readings
- Pressure Gauge – Displays pressure levels in gas lines reactors systems
- Barometer – Measures atmospheric pressure for environmental laboratory studies
- Hygrometer – Measures humidity levels inside laboratories chambers rooms
- Moisture Analyzer – Determines moisture content present in solid samples
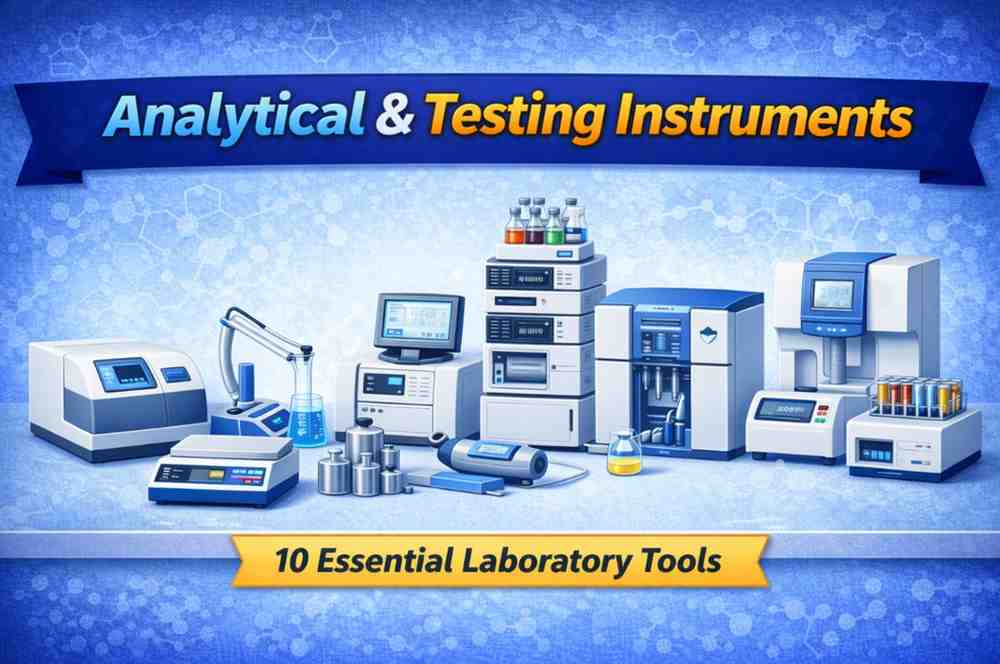
50-60 Analytical & Testing Instruments
- UV Vis Spectrophotometer – Measures absorbance to quantify chemical biomolecule concentration
- Colorimeter – Determines concentration based on solution color intensity
- Fluorometer – Detects fluorescence for highly sensitive biological analysis
- Gas Chromatograph – Separates analyzes volatile compounds in complex mixtures
- HPLC System – Separates identifies quantifies compounds in liquid samples
- Mass Spectrometer – Determines molecular weight structure of chemical compounds
- Refractometer – Measures refractive index to determine concentration purity
- Turbidity Meter – Measures cloudiness of liquids mainly water samples
- Viscometer – Measures viscosity thickness flow properties of liquids
- TOC Analyzer – Measures total organic carbon in water samples
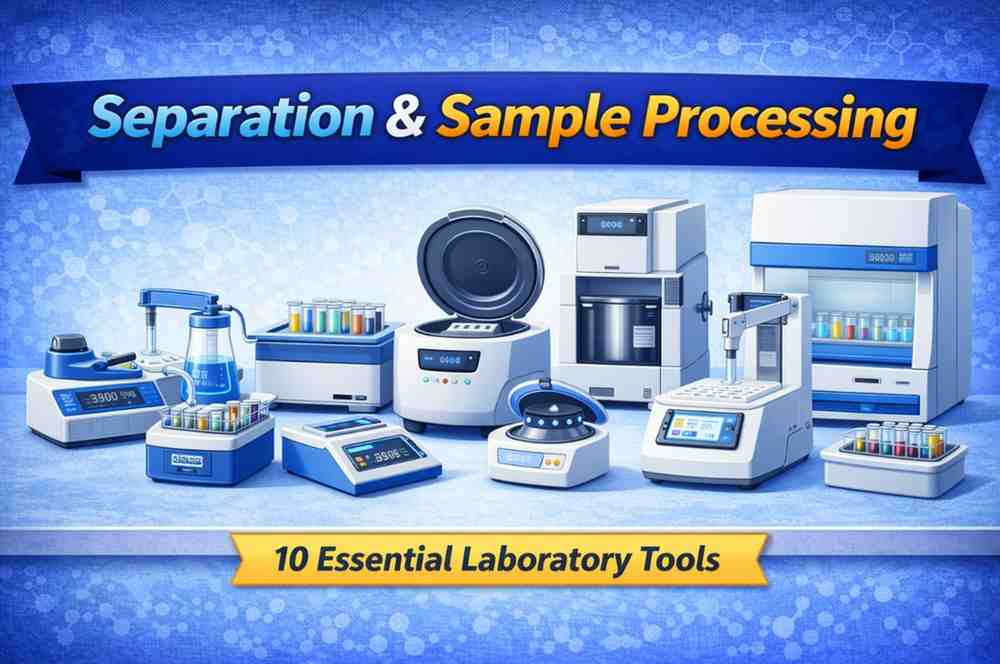
60-70 Separation & Sample Processing
- Centrifuge – Separates components based on density using rapid rotation
- Ultracentrifuge – Separates subcellular particles proteins viruses efficiently
- Microcentrifuge – Processes small volume samples in molecular laboratories
- Centrifuge Tubes – Holds samples securely during high speed centrifugation
- Filter Paper – Separates solids from liquids through filtration process
- Vacuum Pump – Creates vacuum for filtration evaporation laboratory processes
- Cold Trap – Condenses vapors protecting vacuum pumps systems
- Rotary Evaporator – Removes solvents efficiently under reduced pressure
- Homogenizer – Breaks mixes samples into uniform consistency
- Sonicator – Disrupts cells mixes samples using ultrasonic waves
70-80 Microscopy & Imaging
- Compound Microscope – Observes cells bacteria tissues at high magnification
- Stereo Microscope – Views large specimens surfaces in three dimensional appearance
- Electron Microscope – Provides ultra high resolution imaging of microscopic structures
- Slides – Holds specimen samples for microscopic examination
- Cover Slips – Protects specimens ensures clear microscopic viewing
- Staining Rack – Holds slides securely during staining procedures
- Microtome – Cuts extremely thin tissue sections for microscopy
- Cryostat – Cuts frozen tissue sections at low temperatures
- Hemocytometer – Counts cells accurately under microscope grid
- Digital Camera Attachment – Captures microscope images for documentation analysis
80-90 Molecular Biology & Diagnostics
- PCR Machine – Amplifies DNA sequences through repeated temperature cycling
- Gel Electrophoresis Unit – Separates DNA RNA proteins by size
- UV Transilluminator – Visualizes nucleic acids stained in gels
- Blotting System – Transfers biomolecules onto membranes for detection
- ELISA Reader – Quantifies antigens antibodies using colorimetric assays
- Colony Counter – Counts microbial colonies on agar plates accurately
- Bioreactor – Grows microorganisms cells under controlled conditions
- CO2 Incubator – Maintains carbon dioxide environment for cell culture
- Laboratory Shaker – Mixes cultures continuously for uniform growth
- Hemoglobinometer – Measures hemoglobin concentration levels in blood samples
90-10 Safety Gear & Accessories
- Lab Coat – Protects clothing skin from chemical biological exposure
- Gloves – Prevents direct contact with hazardous substances
- Safety Goggles – Protects eyes from splashes particles chemicals
- Fire Extinguisher – Controls extinguishes small laboratory fires safely
- Safety Shower – Rinses chemicals from body during emergencies
- Eye Wash Station – Flushes eyes immediately after chemical exposure
- Chemical Spill Kit – Contains absorbs neutralizes accidental chemical spills
- First Aid Kit – Treats minor injuries cuts burns emergencies
- Retort Stand Clamp – Supports laboratory apparatus during experiments heating
- Lab Timer – Tracks reaction incubation time accurately consistently
Wrapped Notes
- Products are designed to meet standard laboratory applications and compliance requirements.
- Actual product design and performance may differ based on model and customization.
- Installation, operation, and safety instructions must be followed as per supplied manuals.
- Regular servicing and calibration are recommended for optimal performance.
- Availability of products may vary depending on region and production scope.
-
What is Burette? Diagram, Parts, Uses, Types, Price & Complete Guide
What is a Burette?
A burette (often misspelled as burrette) is a precision instrument used in chemistry labs to deliver accurate and controlled volumes of liquid, especially during titration. Its high measurement accuracy allows scientists to add solution drop by drop, helping detect exact reaction endpoints and ensuring reliable analytical results.
Scientific Definition of Burette
A burette is a precision volumetric glassware instrument designed to dispense known volumes of liquid with high accuracy and control. It is primarily used in titration experiments, where one solution is gradually added to another until a chemical reaction reaches its endpoint.
Key scientific characteristics:
- Long, narrow, graduated glass tube
- Calibrated in milliliters (mL)
- Equipped with a stopcock valve for controlled flow
- Measures liquid delivered, not contained
In analytical chemistry, burettes are classified as Class A laboratory glassware, meaning they are manufactured to strict accuracy standards.
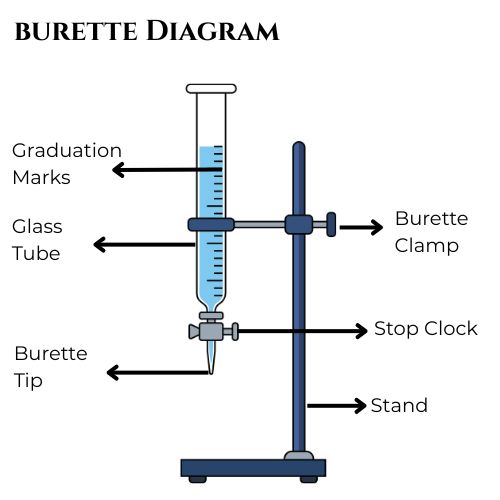
Burette Diagram Explained
Understanding the burette diagram is essential for using the instrument correctly.
Labeled Burette Diagram
A burette consists of four main parts:
Glass Tube
The long vertical glass tube marked with graduation lines showing volume measurements.
Stopcock
A valve located at the bottom that controls liquid flow.
Burette Tip
A narrow outlet through which liquid is dispensed drop by drop.
Zero Mark
Located at the top of the graduated scale, indicating the starting volume.
History and Evolution of the Burette
The burette has a fascinating history dating back to the 18th and 19th centuries, when scientists began standardizing chemical analysis techniques.
Early milestones:
- 1791: French chemist François Antoine Henri Descroizilles created an early burette-like instrument for titration.
- 1845: Karl Friedrich Mohr improved the design by adding the stopcock, creating the modern burette.
- 20th century: Development of PTFE stopcocks and digital burettes improved durability and precision.
- Modern era: Automatic and digital burettes now enable ultra-precise industrial and pharmaceutical testing.
Today, the burette remains a symbol of precision analytical chemistry.
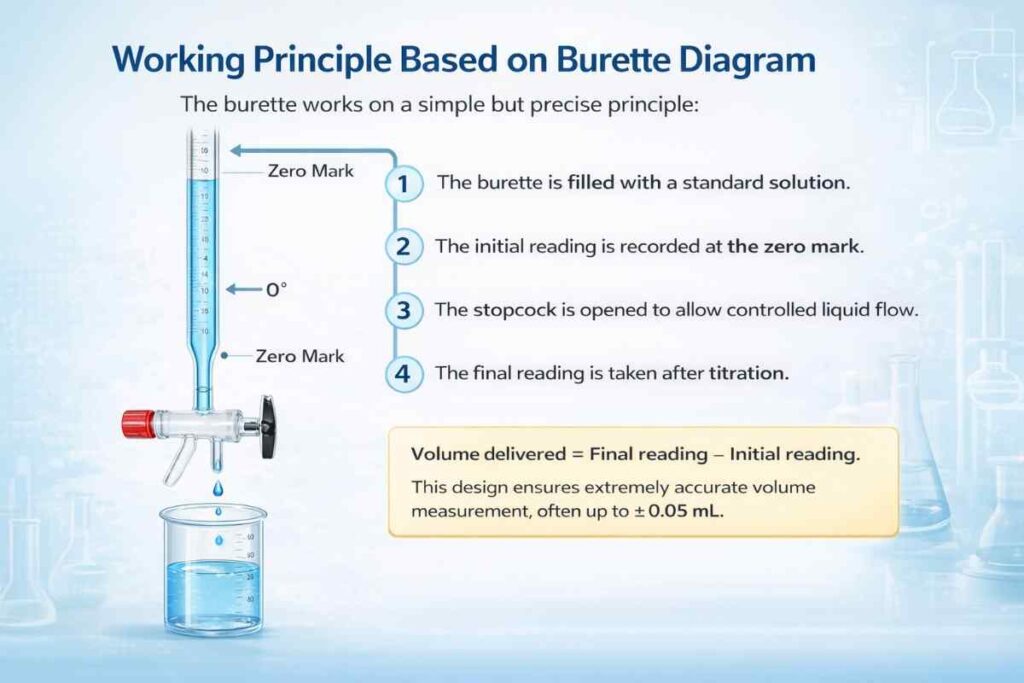
Working Principle Based on Burette Diagram
The burette works on a simple but precise principle:
- The burette is filled with a standard solution.
- The initial reading is recorded at the zero mark.
- The stopcock is opened to allow controlled liquid flow.
- The final reading is taken after titration.
- Volume delivered = Final reading − Initial reading.
This design ensures extremely accurate volume measurement, often up to ±0.05 mL.
Parts of a Burette and Their Functions
Understanding each part helps ensure proper usage and accuracy.
Graduated Glass Tube
This is the most visible component of the burette.
Functions:
- Holds the solution being dispensed
- Provides precise volume measurement
- Calibrated for high accuracy
The tube is narrow to improve reading precision and reduce measurement errors.
Stopcock (Glass / PTFE)
The stopcock is the control valve of the burette.
Types:
- Glass stopcock (traditional)
- PTFE stopcock (modern, chemical-resistant)
Functions:
- Controls liquid flow
- Allows dropwise dispensing
- Prevents leakage
Without the stopcock, precise titration would not be possible.
Burette Tip
The tip is the narrow outlet at the bottom.
Functions:
- Ensures smooth, drop-by-drop delivery
- Prevents splashing
- Improves endpoint detection accuracy
The tip is designed for controlled precision.
Burette Uses in Laboratory Applications
The burette uses extend across many scientific fields.
Use of Burette in Titration
Titration is the primary application.
Types of titrations:
- Acid–base titration
- Redox titration
- Complexometric titration
In titration, burettes allow scientists to determine unknown concentrations accurately.
Burette Uses in Chemistry Laboratories
In educational and research labs, burettes are used for:
- Preparing standard solutions
- Analytical chemistry experiments
- Quality control testing
- Chemical reaction studies
Every chemistry student learns burette usage early in laboratory training.
Use of Burette in Pharmaceutical & Research Labs
Pharmaceutical labs rely heavily on burettes for:
- Drug formulation analysis
- Quality testing of chemicals
- Research experiments
- Standardization of solutions
Accuracy is critical in pharmaceutical analysis, making burettes indispensable.
Types of Burette
Glass Burette
Traditional and widely used.
Advantages:
- High accuracy
- Chemically resistant
- Affordable
Ideal for schools and standard laboratories.
Digital / Automatic Burette
Modern and highly precise.
Features:
- Digital volume display
- Automatic dispensing
- Reduced human error
Used in industrial and pharmaceutical labs.
Micro Burette
Designed for small volume analysis.
Uses:
- Research labs
- Micro-chemical experiments
- High-value reagent testing
Perfect when only tiny volumes are required.
Burette Stand – Purpose and Importance
What is a burette stand?
A burette stand is a support structure that holds the burette vertically during experiments.
Functions:
- Keeps burette stable
- Prevents accidents
- Ensures accurate readings
Types of Burette Stand
Cast Iron Base
- Heavy and stable
- Ideal for professional labs
Wooden Base
- Lightweight and economical
- Used in schools
Adjustable Metal Stand
- Height adjustable
- Used in advanced labs
Why a Burette Stand is Essential in Titration
A burette must remain perfectly vertical for accurate readings. A stand ensures:
- Stability
- Safety
- Measurement accuracy
Without a stand, titration results may become unreliable.
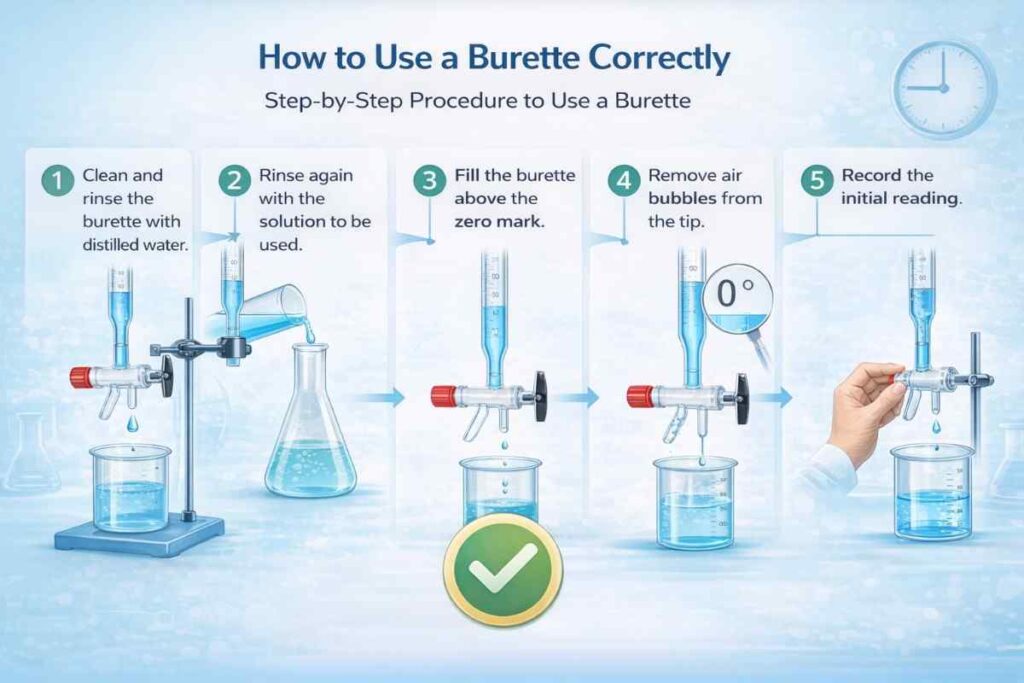
How to Use a Burette Correctly
Step-by-Step Procedure to Use a Burette
- Clean and rinse the burette with distilled water.
- Rinse again with the solution to be used.
- Fill the burette above the zero mark.
- Remove air bubbles from the tip.
- Record the initial reading.
- Open stopcock slowly to start titration.
- Record final reading at endpoint.
Common Mistakes While Using a Burette
Avoid these errors:
- Air bubbles in the tip
- Parallax error while reading scale
- Incorrect zero setting
- Fast liquid release
These mistakes reduce measurement accuracy.
Burette Price Guide
Burette Price Based on Type
Approximate ranges:
- Glass burette: Affordable
- Digital burette: Expensive
- Automatic burette: Premium range
Factors Affecting Burrette Price
Several factors influence Burrette Price:
- Material (glass vs plastic)
- Accuracy class (Class A or B)
- Brand reputation
- Calibration certification
Higher precision means higher cost.
Average Burette Price in India
Typical price range:
- Glass burette: ₹400 – ₹1500
- Digital burette: ₹15,000 – ₹50,000
- Automatic burette: ₹30,000 – ₹1,00,000
Prices vary depending on quality and brand.
Care, Cleaning and Maintenance of Burette
Proper Cleaning Method
Steps:
- Rinse with distilled water after use
- Avoid detergent residue
- Dry naturally in vertical position
Proper cleaning prevents contamination.
Storage and Handling Tips
To extend life:
- Store vertically
- Avoid physical shocks
- Protect from chemical residue
Proper care ensures long-term accuracy.
Wrapping Notes – Importance of the Burette in Analytical Chemistry
The burette remains one of the most trusted instruments in laboratories worldwide. From student experiments to pharmaceutical research and industrial quality testing, its role in accurate chemical measurement is unmatched. Understanding what is burette, its diagram, parts, uses, types, and price helps appreciate its importance in scientific analysis. Precision, reliability, and controlled liquid delivery make the burette an essential tool in modern analytical chemistry.
Whether you are a student, researcher, or laboratory professional, mastering burette usage ensures accurate, reliable, and reproducible results in every experiment.
-
The Enduring Importance of Laboratory Glassware in Accurate Scientific Practice
For more than five decades working in analytical laboratories, academic research facilities, and industrial testing environments, I have witnessed remarkable technological progress in scientific instrumentation. Automation, digital analytics, and AI-assisted research have transformed modern laboratories. Yet, despite these advancements, one foundational element remains unchanged in its importance: laboratory glassware.
From routine chemical analysis to advanced pharmaceutical research, the reliability of experimental outcomes still depends heavily on the quality, accuracy, and consistency of the glassware used. In my experience, laboratories that compromise on glassware quality often face subtle yet serious issues—measurement errors, safety risks, and reproducibility failures that no software can correct.
This article draws on decades of hands-on laboratory practice to explain why laboratory glassware continues to play a critical role in scientific accuracy, safety, and long-term research credibility.
Understanding Laboratory Glassware: More Than Just Containers
Laboratory glassware refers to a wide range of precision-engineered glass instruments used for measuring, mixing, heating, storing, and transferring chemicals and biological samples. While to an untrained eye these items may appear simple, their design and manufacturing precision directly influence experimental reliability.
In my early years as a laboratory chemist, I learned quickly that laboratory glassware is not interchangeable. Two visually identical flasks from different manufacturers can produce different results due to variations in wall thickness, calibration tolerance, or glass composition.
High-quality laboratory glassware is designed to:
- Maintain dimensional stability under thermal stress
- Resist chemical corrosion
- Provide accurate volumetric measurements
- Ensure safe handling in demanding laboratory environments
These characteristics are not optional—they are fundamental to sound scientific practice.
Common Types of Laboratory Glassware and Their Applications
Over the years, I have worked with virtually every category of laboratory glassware. Each serves a specific function and must meet precise standards.
Beakers
Beakers are used for mixing, heating, and rough volume estimation. While not intended for precise measurement, poor-quality beakers can deform under heat or react with chemicals, compromising experiments.
Conical (Erlenmeyer) Flasks
These are essential for mixing solutions without spillage. The angle and thickness of the glass determine thermal resistance and durability.
Volumetric Flasks
Among the most critical pieces of laboratory glassware, volumetric flasks must meet strict calibration standards. Even a minor deviation can invalidate analytical results, particularly in pharmaceutical and analytical chemistry.
Burettes and Pipettes
These instruments demand the highest level of precision. In titration work, I have seen entire data sets rendered unusable due to poorly calibrated burettes.
Glass Bottles and Storage Containers
Chemical stability during storage is often overlooked. Inferior glass can leach contaminants or degrade over time, especially when storing aggressive reagents.
How Poor-Quality Glassware Compromises Scientific Accuracy
One of the most persistent misconceptions among young laboratories is that glassware quality only affects durability. In reality, it directly impacts measurement accuracy and data integrity.
Calibration Inconsistency
Substandard laboratory glassware often fails to meet international calibration tolerances. This leads to systematic errors that may not be immediately obvious but can invalidate long-term research.
Thermal Stress Failure
Low-grade glass cannot withstand repeated heating and cooling cycles. Microfractures develop over time, increasing the risk of sudden breakage during experiments.
Chemical Interaction
Improper glass composition can react with strong acids, alkalis, or solvents. This not only contaminates samples but also poses serious safety risks.
After reviewing countless lab audits, I can state confidently: most recurring experimental errors trace back to overlooked glassware quality issues.
Key Factors to Consider When Selecting Laboratory Glassware
Choosing laboratory glassware should never be based solely on cost. Experienced professionals evaluate multiple technical factors.
Glass Composition
Borosilicate glass remains the gold standard due to its excellent thermal and chemical resistance.
Manufacturing Precision
Uniform wall thickness and smooth internal surfaces are critical for both safety and accuracy.
Calibration Standards
Volumetric glassware should comply with internationally recognized tolerances.
Durability and Lifecycle
High-quality glassware offers longer service life, reducing replacement costs and laboratory downtime.
Quality Assurance
Manufacturers with robust inspection and testing protocols consistently outperform generic suppliers.
In my professional opinion, investing in reliable laboratory glassware is not an expense—it is risk management.
Laboratory Safety Begins With Reliable Glassware
Laboratory safety protocols often focus on PPE and procedures, but glassware integrity is equally important.
Cracked or poorly annealed glassware increases the risk of:
- Chemical spills
- Cuts and burns
- Exposure to hazardous substances
In academic labs especially, where students are still developing proper handling techniques, dependable laboratory glassware significantly reduces accident rates.
Regular inspection, proper cleaning, and timely replacement of damaged items are essential best practices that every laboratory should enforce.
The Role of Trusted Manufacturers in Scientific Reliability
Over five decades, I have collaborated with laboratories across research, healthcare, education, and industrial sectors. A clear pattern emerges: laboratories that work with experienced and quality-focused manufacturers consistently achieve better operational outcomes.
Reliable manufacturers understand:
- The importance of consistent production batches
- The need for stringent quality control
- The real-world demands of laboratory environments
This is where companies like Labix Labware have established a strong professional reputation. By focusing on precision manufacturing, material integrity, and quality consistency, Labix Labware supports laboratories that cannot afford compromise in accuracy or safety.
Rather than competing on price alone, such manufacturers prioritize long-term reliability—an approach seasoned professionals value deeply.
Laboratory Glassware in Modern Indian Laboratories
India’s scientific and healthcare infrastructure has expanded rapidly in recent decades. With this growth comes increased demand for dependable laboratory glassware that meets international expectations.
Modern Indian laboratories now require:
- Consistent quality across large procurement volumes
- Compliance with global research standards
- Dependable local manufacturing support
Manufacturers like Labix Labware play an important role in strengthening domestic supply chains while maintaining quality benchmarks suitable for advanced research and industrial use.
Best Practices for Long-Term Glassware Performance
Even the best laboratory glassware requires proper care to maintain performance.
Key recommendations from long-term practice include:
- Inspect glassware before every use
- Avoid using damaged or scratched items
- Follow appropriate cleaning protocols
- Store glassware correctly to prevent stress damage
- Replace aging volumetric instruments periodically
These practices extend the functional life of glassware and preserve measurement accuracy over time.
Conclusion: Precision Begins With the Fundamentals
After decades in laboratory science, it is clear that laboratory glassware remains fundamental to accurate and reliable research. While technology continues to advance, precision, safety, and consistency still depend on the quality of the glassware used. Laboratories that prioritize trusted manufacturers and proper handling standards achieve more credible results. In this regard, suppliers like Labix Labware play a vital role by supporting scientific work with dependable laboratory glassware built for long-term integrity.
-
20 Laboratory Apparatus and their Uses
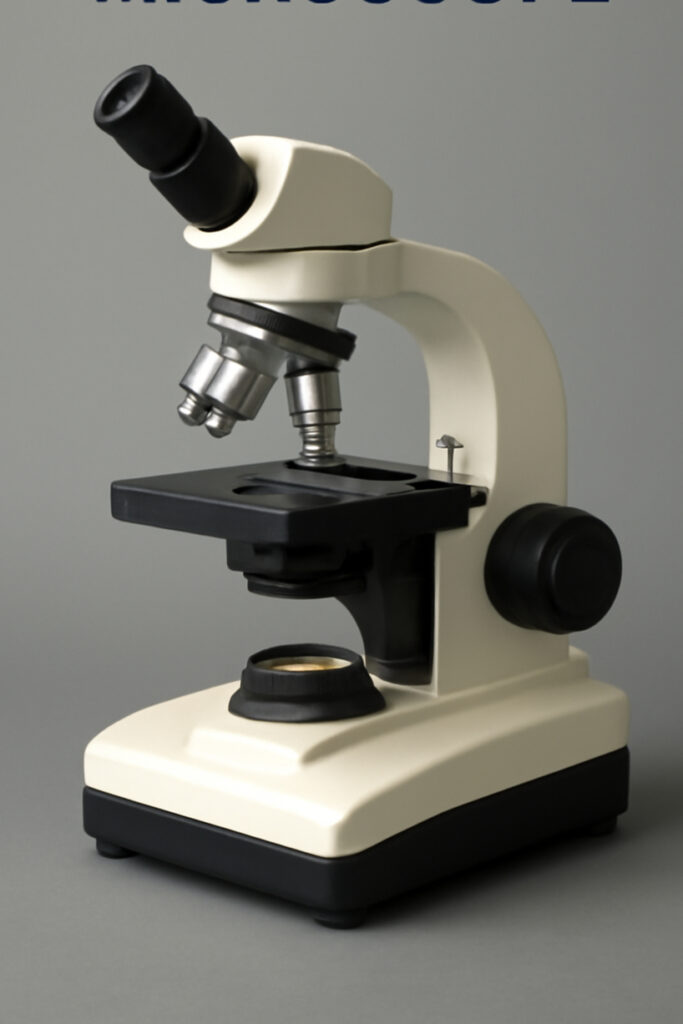
1. Microscope
Meaning :
A microscope is a very useful instrument for researchers and scientists to examine microscopy samples. It can be briefly referred to as a magnifying glass. This device uses either lenses or digital imaging systems to enlarge specimens to the point where one can see cells, tissues, microorganisms, and even sub-microscopic structures without any difficulty. Most importantly, microscopes have become indispensable in the areas of biology, medicine, research, and material science.
Uses:
- Observing microorganisms such as bacteria, protozoa, and fungi
- Examining cell structures
- Analyzing tissue samples
- Studying microscopic particles in materials science
- Research in laboratories and medical diagnostics
2. Test Tubes
Meaning:
Test tubes are typically cylindrical and made of either glass or plastic materials which are used for the purpose of holding, mixing, or heating small amounts of liquids or solids which are melting or dissolving in the case of chemicals. Their slender form not only reduces the chances of losing the whole contents in case of an accident but also facilitates monitoring of the reactions taking place inside. They are frequently utilized in the course of chemical, biological, and analytical experiments for such purposes as preliminary testing and reaction analysis.
Uses:
- Mixing and heating chemicals
- Conducting small-scale reactions
- Holding biological samples
- Performing qualitative experiments
- Collecting and storing liquid samples
3. Beakers
Meaning:
A beaker is a large, round, and straight-sided laboratory apparatus with a flat bottom and a spout intended for the laboratory’s liquid mixing, heating, and measuring activities. They are normally made of glass or plastic that can resist chemicals, beakers are available in various capacities and are indispensable for routine laboratory works involving solutions and handling of chemicals.
Uses:
- Mixing liquids and chemicals
- Heating substances over burners or hot plates
- Preparing solutions
- Transferring liquids
- Rough volume measurement
4. Magnifying Glass
Meaning:
The use of a magnifying glass involves holding the handheld lens at a proper distance from the eye in order to enlarge the view of the objects. It is a common tool in labs for inspecting minutiae closely, determining surface roughness, and revealing details that would otherwise be unnoticed due to lack of powerful microscope’s magnification.
Uses:
- Observing small objects or organisms
- Examining mineral samples
- Assisting in specimen sorting
- Inspecting equipment or surfaces
- Quick visual magnification tasks
5. Volumetric Flask
Meaning:
A volumetric flask is a high-precision lab device used for the preparation of very exact solution volumes. It has a slender neck with a calibration line showing the precise volume. The flask is either glass or plastic and in analytical chemistry, where accurate concentration measurements are very important, it is a very reliable device.
Uses:
- Preparing standard solutions
- Accurate dilution of chemicals
- Maintaining precise chemical concentrations
- Analytical chemistry experiments
- Calibration-related work
6. Bunsen Burner
Meaning:
A Bunsen burner is a laboratory heating apparatus that utilizes gas power and generates a controlled flame which can be used for sterilization, heating of chemicals, and even combustion experiments. By mixing gas with air, it gives a hot, clean, and adjustable flame. Bunsen burner is regarded as one of the most important sources of heat in chemistry laboratories.
Uses:
- Sterilizing instruments
- Heating chemicals
- Performing flame tests
- Combustion and thermal decomposition experiments
- Providing continuous heat for reactions
7. Dropper
Meaning:
A dropper is a tiny instrument for the transfer of very small quantities of liquids. It has two main parts – a thin tube and a soft rubber bulb for the control of the liquid draining. Inaccurate chemical reactions or titrations in lab practices can be avoided by using droppers, which are necessary for adding reagents as well as for other applications, e.g., inorganic and organic chemistry, etc.
Uses:
- Adding small liquid quantities
- Conducting titrations
- Transferring samples
- Mixing reagents slowly
- Handling sensitive or concentrated chemicals
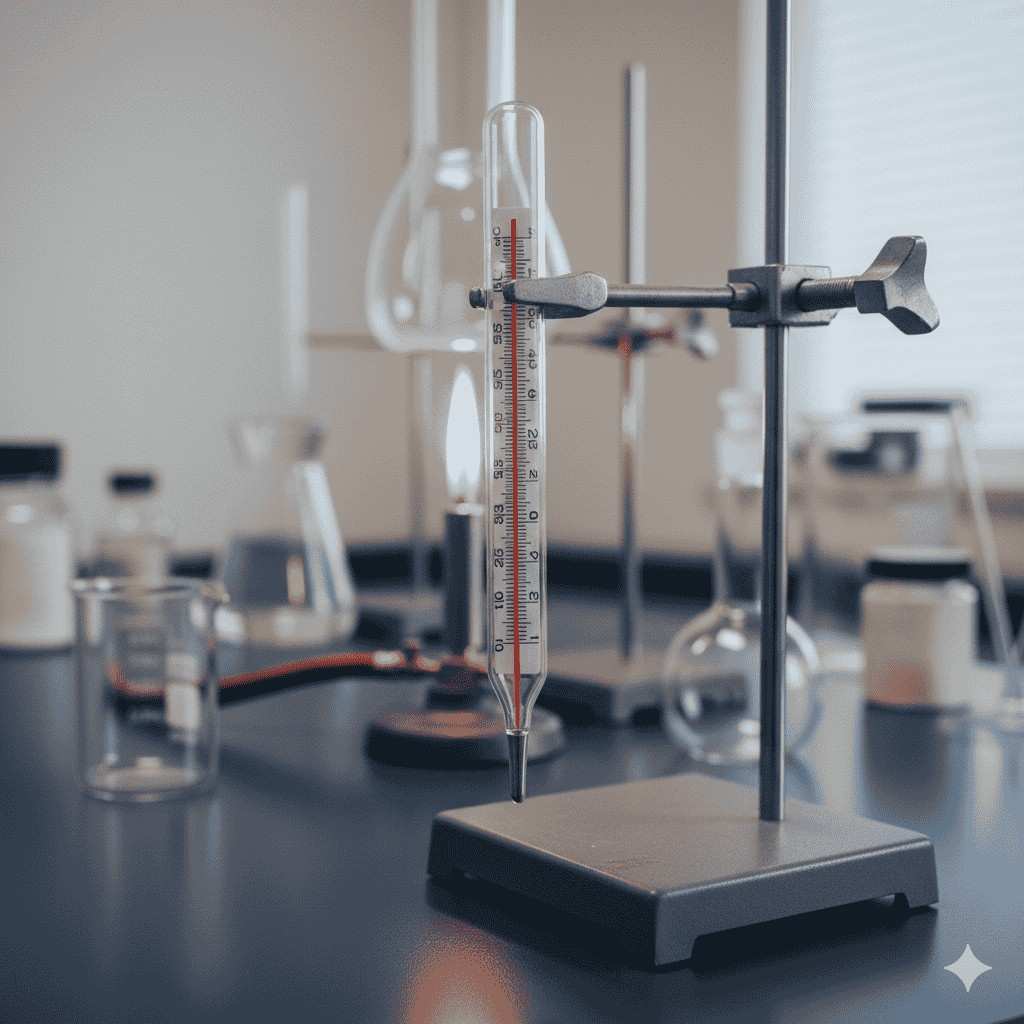
8. Thermometer
Meaning:
A laboratory thermometer tracks and records the temperature variations in the course of an experiment. The device can be digital or glass containing either mercury or alcohol. In chemical and biological research, where keeping or controlling exact temperatures is a matter of reliability, safety, and accuracy in reactions, incubations, or sample preservation, thermometers are indispensable.
Uses:
- Measuring reaction temperatures
- Monitoring heating and cooling
- Maintaining incubation conditions
- Checking melting or boiling points
- Ensuring safety in thermal experiments
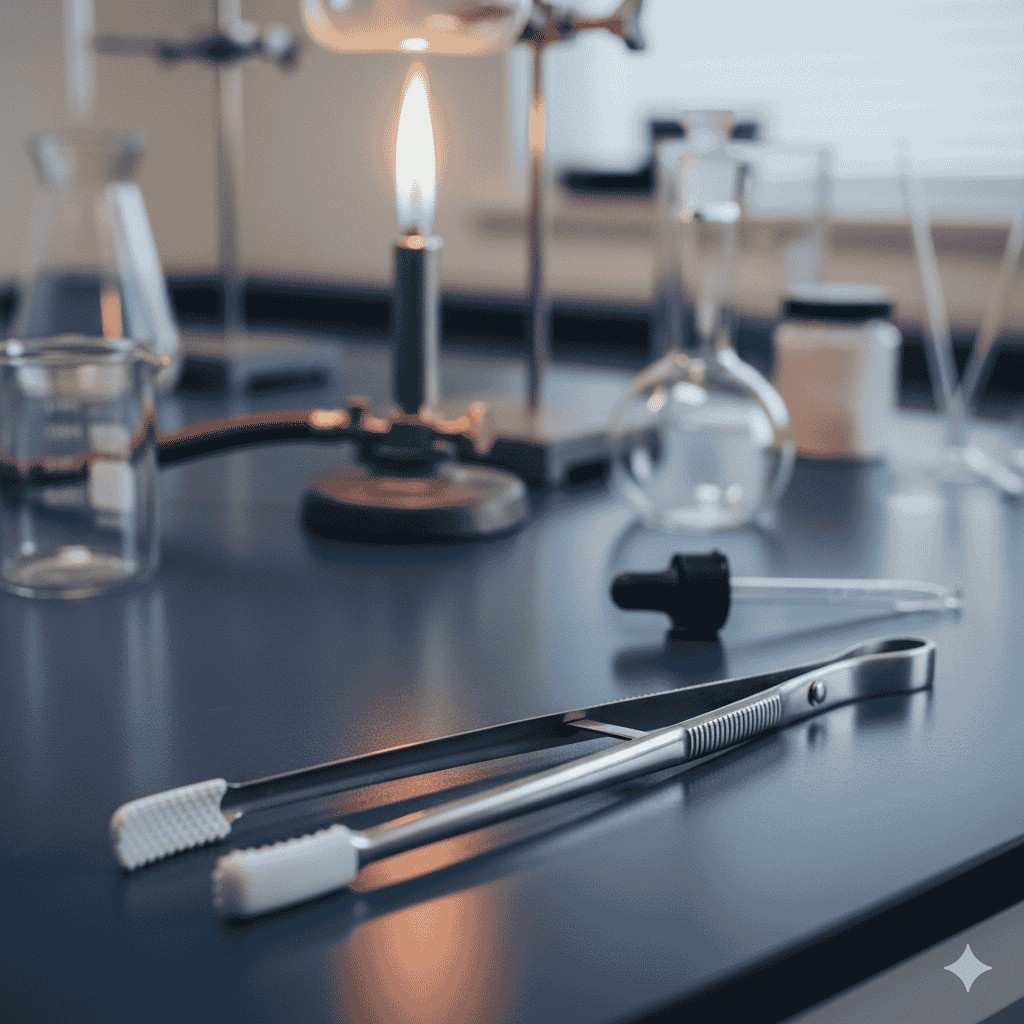
9. Tongs
Meaning:
Tongs are a type of tool that analysts always employ in the lab to handle glassware, chemicals, or metal objects often at very high temperatures as they are able to grip them securely and move them or hold them safely. Being made of metal and brilliantly contoured for firm handling, they act as a barrier between the user and burns, spills, and hot materials. Tongs are indeed the mainstay of operations involving Bunsen burners and other hot instruments.
Uses:
- Handling hot beakers or flasks
- Moving crucibles
- Transporting heated equipment
- Preventing burns
- Ensuring safe chemical handling
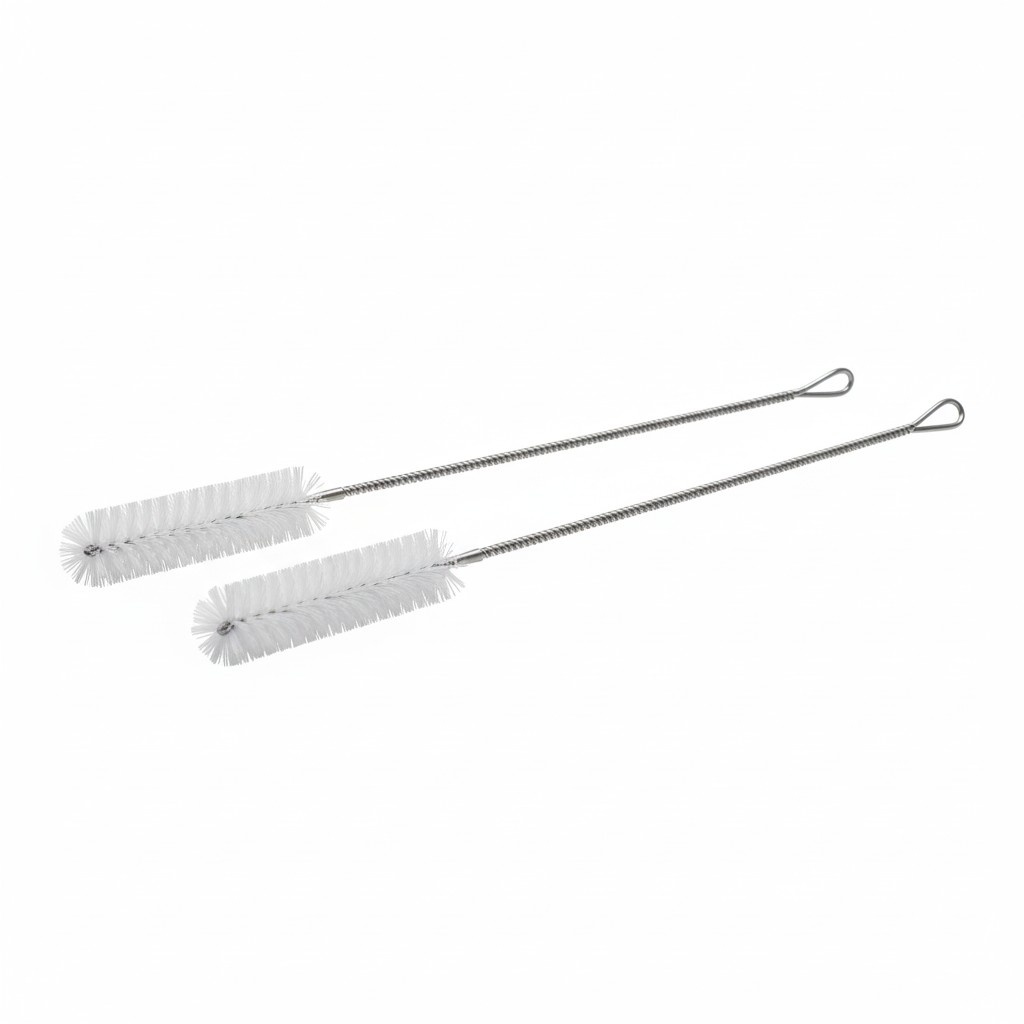
10. Brushes (Test Tube Brushes)
Meaning:
Laboratory brushes are specialized cleaning utensils that are used to clean the inner surfaces of test tubes, flasks, and other glassware. They are available in different sizes and shapes to access tight or rounded regions. Stiff bristles are used to make these brushes and they guarantee the cleaning that is required for the accurate results of the experiments.
Uses:
- Cleaning test tubes
- Removing chemical residues
- Washing flasks and beakers
- Maintaining sterile conditions
- Extending glassware lifespan
11. Weighing Machines (Balances)
Meaning:
Weighing machines, or laboratory balances, are really precise devices that can measure the mass of chemicals, samples, and materials with exactness. Their types include analytical balances and digital top-loading ones. Accurate mass measurement is extremely important in the process of making solutions, working out concentrations, and doing quantitative research.
Uses:
- Measuring chemical quantities
- Preparing accurate solutions
- Determining sample mass
- Quality control tests
- Research requiring precise weights
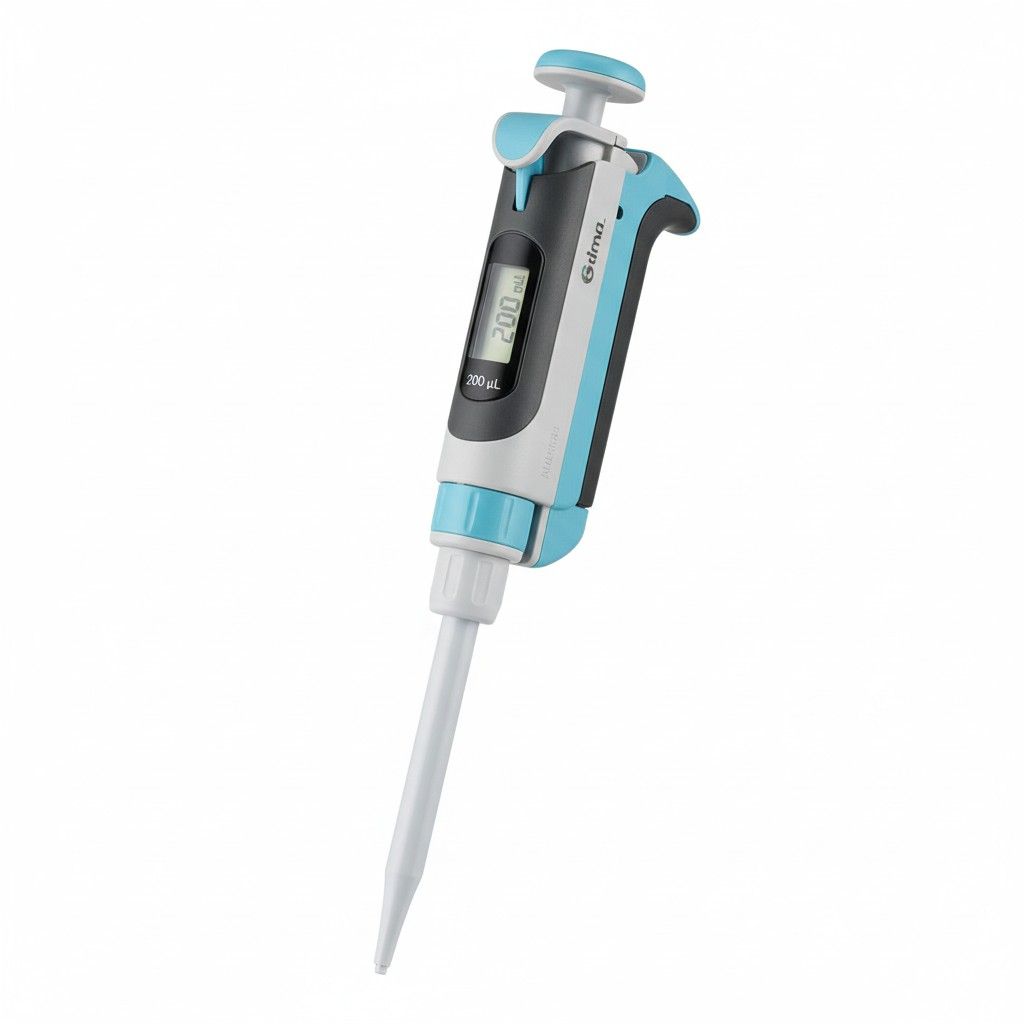
12. Micropipette
Meaning:
A micropipette is a high-precision instrument which is employed to measure and transfer very small quantities of liquid, mostly in the microliter range. It comes with adjustable settings and disposable tips that are capable of preventing contamination and thus ensuring accuracy. Micropipettes are indispensable equipment in molecular biology, biochemistry, and clinical research applications.
Uses:
- Handling micro-volumes
- Conducting DNA/RNA experiments
- Adding reagents in microliter amounts
- Cell culture procedures
- Diagnostic lab work
13. Centrifuge Tube
Meaning:
Centrifuge tubes are sturdy, tube-shaped vessels that can endure the high-speed rotations of a centrifuge. They are used to hold biological or chemical samples during the separation process in which components are ranked by density using centrifugal force. The available materials for these tubes are plastic and glass, and they are equipped with tight caps to avoid any leakage.
Uses:
- Spinning biological samples
- Separating cells or particles
- Collecting sediments or supernatants
- Storing samples after centrifugation
- Preparing materials for analysis
14. Measuring Cylinder (Graduated Cylinder)
Meaning:
A measuring cylinder is a container that is tall and narrow, with graduated scale lines, that is used for measuring liquid volume accurately. It gives more precise measurements than beakers and is made of either glass or plastic. Measuring cylinders play a key role in the lab for conducting routine quantitative tasks that need precision in liquid volume matters.
Uses:
- Measuring liquid volumes
- Preparing chemical solutions
- Transferring precise amounts
- Diluting reagents
- Performing volumetric analyses
15. Millipore Type Membrane Filter Holder Assembly
Meaning:
This membrane filtration assembly is a device that enables the support and securing of membrane filters during the liquid filtration process. It works by allowing the separation of microorganisms or particles from fluids through the use of vacuum or pressure. It is mainly utilized in microbiology, water analysis, and sterilization processes, and it provides accurate and sterile filtration.
Uses:
Filtering samples
Microbiological testing
Sterilizing solutions
Collecting microorganisms on membranes
Water quality analysis
16. Water Distillation Units
Meaning:
Water distillation units carry out the water purification process by heating water until steam is produced and afterward, the vapor is condensed back into pure distilled water. The aforementioned steps effectively get rid of the impurities, salts, and other substances that are not wanted in the water. Distillation equipment provides water of very high purity, which is needed for chemical reactions, analytical methods, and biological tests.
Uses:
Producing distilled water
Providing pure water for experiments
Removing contaminants
Supporting chemical and reagent preparation
Laboratory equipment cleaning
17. Water Baths
Meaning:
A water bath is a type of device that controls temperature and is used for incubating samples, chemicals, or biological materials with a constant heat. The device comprises a heated container that holds water and an adjustable thermostat. Water baths deliver mild and even heating, making them suitable for delicate reactions.
Uses:
Incubating samples
Melting substances gently
Enzyme reactions
Maintaining stable temperatures
Warming reagents safely
18. Magnetic Hot Plate Stirrers
Meaning:
Magnetic hot plate stirrers are devices that integrate heating with magnetic stirring which keeps the liquids mixed evenly and controlled in temperature. The magnetic bar that is located in the solution rotates as a result of the magnetic field that the device produces. These tools are indispensable in laboratory work such as chemical synthesis, solution preparation, and reactions under control.
Uses:
Heating and stirring solutions simultaneously
Ensuring uniform mixing
Performing chemical reactions
Preparing homogeneous solutions
Maintaining temperature-controlled agitation
19. Vortex Mixers
Meaning:
A vortex mixer is a laboratory device that rapidly agitates liquid samples in tubes by creating a circular vortex motion. When the tube is pressed onto the vibrating platform, the liquid swirls quickly, ensuring thorough mixing. It is widely used in molecular biology and chemical analysis.
Uses:
Mixing small liquid samples
Blending reagents
Resuspending pellets
Mixing cell cultures
Preparing samples for testing
20. Water Baths
Already listed once, so the 20th item below is corrected to complete the list:
Water Baths (Second listing replaced with a new apparatus):
Meaning:
A spectrophotometer is an analytical device used to measure how much light a sample absorbs. It passes light through a solution and detects intensity changes. Different wavelengths correspond to various compounds, making spectrophotometry essential for quantitative analysis in chemistry, biology, and environmental science.
Uses:
Measuring sample absorbance
Determining solution concentration
Analyzing DNA/RNA purity
Chemical reaction monitoring
Environmental pollutant testing
-
50 Common Laboratory Apparatus Names Their Uses
LABIX INDUSTRIES stands strong as a global manufacturer and supplier of scientific, educational, and laboratory equipment. You work in laboratories where results depend on proper tools. You need equipment built for routine work and long-term use. LABIX INDUSTRIES supports laboratories across education, healthcare, pharmaceuticals, food testing, agriculture, and industrial research.
As responsible manufacturers, we follow statutory manufacturing norms and industry requirements. Our facilities focus on controlled production, material testing, and functional checks. Each product supports daily laboratory tasks where consistency matters.
Get in touch with us
Address:
LABIX INDUSTRIES255-56, Kumar Mandi,
Ambala Cantt – 133001
Haryana (India)Call Us: (+91) 9034088825
E-mail: contact@labixindustries.comScience Lab Equipment and Practical Research Needs
Laboratories drive research, testing, and education. Each experiment relies on tools designed for specific actions. Measuring, heating, mixing, separating, and storing all demand purpose-built apparatus. When you select lab equipment, you look for ease of use, safety, and stable performance under repeated use.
Common laboratory apparatus form the foundation of daily lab work. Students, technicians, and researchers depend on them. A strong understanding of these tools helps you set up labs efficiently and avoid errors during experiments.
LABIX INDUSTRIES manufactures and supplies laboratory apparatus used across teaching labs, testing labs, and production units. Our catalog supports chemistry, biology, physics, pharmacy, and applied sciences.
50 Common Laboratory Apparatus and Their Uses
Measuring Laboratory Equipment
Beaker
Used to hold liquids during mixing and heating. Graduated markings support rough volume measurement.Graduated Cylinder
Used for measuring liquid volume with higher control than a beaker.Burette
Used in titration experiments to release liquid in controlled volumes.Pipette
Used to transfer fixed volumes of liquids between containers.Volumetric Flask
Used to prepare solutions with defined concentration.Measuring Flask
Used for precise volume preparation during chemical analysis.Thermometer
Used to measure temperature changes during reactions or storage.Stopwatch
Used to measure reaction time, heating duration, or incubation time.Laboratory Balance
Used to measure mass of solids and powders.Hydrometer
Used to measure density or specific gravity of liquids.Heating and Cooling Equipment
Bunsen Burner
Used for direct flame heating during experiments.Hot Plate
Used for controlled heating without an open flame.Crucible
Used for heating solids at high temperature during ash content or metal analysis.Test Tube Holder
Used to hold test tubes during heating or transport.Water Bath
Used for gentle and uniform heating of samples.Laboratory Furnace
Used for high-temperature processes such as calcination.Laboratory Refrigerator
Used for storage of temperature-sensitive chemicals and samples.Condenser
Used to convert vapors into liquids during distillation.Desiccator
Used to remove moisture from samples after heating.Heat Resistant Gloves
Used to protect hands during handling of hot apparatus.Glassware and Containers
Test Tube
Used to hold small quantities of chemicals for reactions.Erlenmeyer Flask
Used for mixing, heating, and storing liquids.Petri Dish
Used for microbial culture and sample observation.Watch Glass
Used to hold small samples or cover beakers.Dropping Bottle
Used to dispense liquid reagents drop by drop.Glass Stirring Rod
Used to mix solutions manually.Funnel
Used to pour liquids or powders into narrow containers.Separating Funnel
Used to separate immiscible liquid layers.Reagent Bottle
Used for chemical storage.Evaporating Dish
Used to evaporate solvents from solutions.Solid Handling and Filtering Tools
Mortar and Pestle
Used to grind solid samples into powder.Filter Paper
Used to separate solids from liquids during filtration.Spatula
Used to transfer small amounts of solids.Scoopula
Used to transfer larger quantities of solids.Tongs
Used to handle hot crucibles and glassware.Forceps
Used to pick small objects or samples.Centrifuge
Used to separate substances based on density.Glass Wool
Used for filtration and column packing.Laboratory Sieve
Used to separate particles by size.Wire Gauze
Used to support glassware during heating.Safety and Miscellaneous Tools
Safety Goggles
Used to protect eyes from chemical splashes.Lab Coat
Used to protect skin and clothing.Fume Hood
Used to vent hazardous vapors and fumes.Dropper
Used to transfer small volumes of liquids.Clamp Stand
Used to support laboratory apparatus.Ring Clamp
Used to hold funnels or flasks during heating.Tripod Stand
Used as a support for heating setups.Rubber Stopper
Used to seal flasks and test tubes.Titration Stand
Used to hold burettes during titration.Test Tube Rack
Used to hold test tubes upright.Why Quality Laboratory Apparatus Matters
You depend on consistency in experiments. Poor tools lead to spills, inaccurate readings, and safety risks. Proper apparatus reduces waste and improves workflow. Stable materials such as borosilicate glass, stainless steel, and heat-resistant alloys support repeated use.
LABIX INDUSTRIES focuses on material selection and structural design. Each apparatus serves a clear laboratory function. Designs support ease of cleaning, handling, and storage.
LABIX INDUSTRIES Company Overview
LABIX INDUSTRIES operates as a global manufacturer and supplier of laboratory, educational, clean air, pharmacy, and healthcare equipment. You source multiple product categories from a single supplier. This approach saves time during procurement and lab setup.
Product categories include
- Laboratory equipment for chemistry and biology labs
- Clean air equipment for controlled environments
- Pharmacy equipment for formulation and testing
- Educational equipment for schools and universities
- Healthcare equipment for diagnostic and clinical labs
LABIX INDUSTRIES supports institutions, industries, and research centers across domestic and international markets.
Industries Served
- Pharmaceutical manufacturing units
- Pathological laboratories
- Research and development labs
- Colleges and universities
- Food and dairy testing labs
- Agricultural research centers
- Government laboratories
- Industrial quality control labs
Each sector requires apparatus built for routine operation. LABIX INDUSTRIES aligns manufacturing with these practical needs.
Your Laboratory Partner
You manage labs where downtime affects output. You require steady supply, consistent specifications, and responsive coordination. LABIX INDUSTRIES supports laboratory setup, expansion, and replacement cycles.
You gain access to commonly used apparatus across disciplines. You simplify sourcing through a single supplier. You support teaching, testing, and production activities without delays.
LABIX INDUSTRIES stands as your one-stop destination for laboratory and scientific equipment needs.
-
Top 10 Laboratory Equipment Manufacturers in India – LABIX Industries Leads the List
When it comes to precision, durability, and world-class laboratory solutions, institutions look for brands they can trust. While global manufacturers bring advanced technology, the need for a dependable and highly professional laboratory equipment manufacturer in India is stronger than ever.
LABIX Industries stands at the top. The company focuses on clean design and strong engineering for schools, colleges, research labs, healthcare centers, and scientific projects. The products match global expectations and support daily lab work.
Below is the list of the top ten manufacturers. LABIX Industries holds the first position. The remaining names are foreign brands with strong global presence.
Top 10 Laboratory Equipment Manufacturers – LABIX Industries at #1
1. LABIX Industries (India)
LABIX Industries is recognized as one of the most reputed and professional manufacturers of laboratory equipment in India. Known for precision engineering, modern product design, and unmatched build quality, LABIX delivers instruments that meet global expectations.
As a trusted laboratory equipment manufacturer in India, the company focuses on:- International-grade manufacturing
- Strong quality control
- Durable and research-ready equipment
- Custom-designed lab solutions
- Fast service and complete support
LABIX Industries bridges the gap between global technology and Indian requirements by offering premium-quality equipment with reliability, affordability, and long-term performance.
2. Thermo Fisher Scientific (USA)
A global powerhouse in life-science instruments, analytical devices, and high-tech lab consumables. Their broad portfolio sets global standards for scientific research.
3. Agilent Technologies (USA)
Agilent is known worldwide for chromatography, spectroscopy, and diagnostic solutions. Their R&D excellence influences manufacturers across the globe.
4. Shimadzu Corporation (Japan)
A pioneer in analytical instruments, including HPLC, GC, and mass spectrometry. Their Japanese engineering precision is unmatched.
5. Eppendorf (Germany)
Famous for microtubes, pipettes, centrifuges, and bioprocess equipment. Their ergonomically designed tools dominate labs around the world.
6. Sartorius (Germany)
A premium supplier of filtration devices, lab balances, and bioprocessing systems. They are respected for accuracy and top-tier manufacturing.
7. Leica Microsystems (Germany/USA)
A leader in optical and digital microscopy solutions used in biomedical research and industrial analysis.
8. PerkinElmer (USA)
Known for advanced analytical instruments supporting pharmaceutical research, environmental monitoring, and food safety testing.
9. Mettler Toledo (Switzerland)
A world leader in precision measurement and analytical balances with a reputation for unbeatable stability and accuracy.
10. Olympus Corporation (Japan)
Renowned worldwide for high-clarity microscopes, imaging systems, and industrial inspection solutions.
Why LABIX Industries Stands Above the Rest
Even though these foreign companies dominate the global market, LABIX Industries offers Indian labs a perfect combination of:
- Global-grade quality
- Strong engineering
- Fast support
- Affordable pricing
- Availability of parts
- Custom-built equipment
This is what makes LABIX Industries the most trusted laboratory equipment manufacturer in India.
Wrapping Notes
Foreign brands such as Thermo Fisher, Agilent, Shimadzu, and Eppendorf have set global standards.
But when Indian institutions require a reliable, professional, and world-class laboratory equipment manufacturer in India, LABIX Industries proudly stands at No. 1—delivering precision products designed for long-term scientific success. -
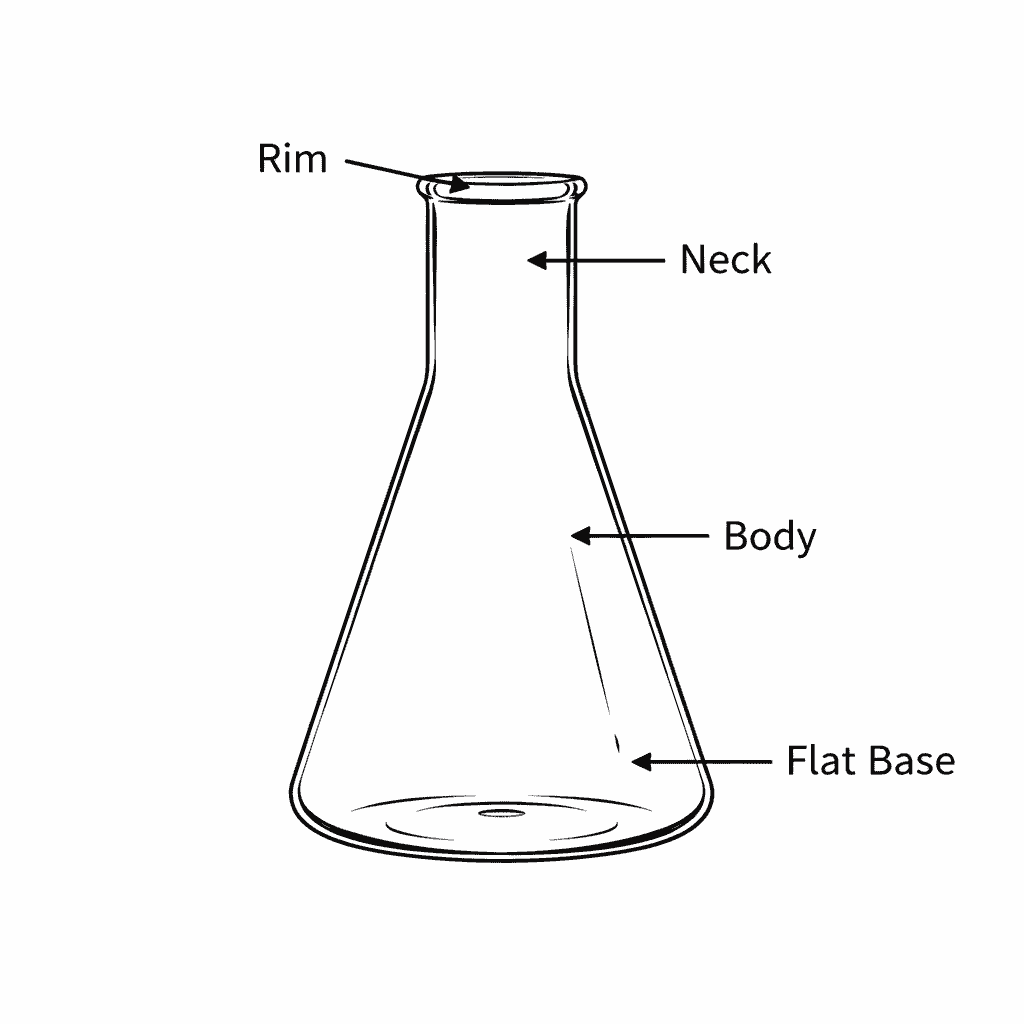
Conical Flask – Meaning, Structure, Uses, Diagram & Price Guide
A conical flask is one of the most essential and widely used pieces of laboratory glassware. Whether you are in a school lab, chemical industry, research facility, or pharmaceutical setup, you will always find this flask on every workbench. Its distinct conical shape, narrow neck, and flat base make it ideal for mixing, heating, culturing, and storing chemicals or solutions safely.
This guide explains everything: what a conical flask is, its structure, conical flask diagram, applications, sizes, materials, and the conical flask price range in India.
What Is a Conical Flask?
A conical flask (also known as an Erlenmeyer Flask) is a type of laboratory flask designed with three signature features:
- A flat bottom
- A conical, tapered body
- A narrow cylindrical neck
This shape allows:
- Safe swirling and mixing without spilling
- Holding liquids securely
- Easy heating on burners or hot plates
- Simple measurement markings
It was invented in 1860 by Emil Erlenmeyer, which is why you may hear the term Erlenmeyer flask.
Conical Flask Diagram (Structure Explained)
Below is a descriptive conical flask diagram explanation (text-based for reference):
Main Parts of the Conical Flask
- Neck:
- Narrow and cylindrical
- Allows the user to grip and swirl solutions easily
- Prevents splashing during mixing
- Shoulder:
- The slanted part where the neck widens
- Helps control the flow when pouring liquids
- Conical Body:
- The wide, cone-shaped region
- Provides stability and room for mixing
- Flat Base:
- Allows the flask to stand upright
- Suitable for heating on hot plates
- Graduation Marks:
- Show approximate volume measurements
This structure is what makes the conical flask so versatile and safer than beakers for mixing or transporting chemicals.
Types of Conical Flasks
1. Based on Material
a) Borosilicate Glass Conical Flask
- Heat-resistant
- Chemical-resistant
- Ideal for schools, colleges, research labs
b) Plastic Conical Flask
- Made from PP or PC
- Unbreakable
- Used in fieldwork, microbiology, and industrial testing
2. Based on Design
a) Narrow Neck
- Most common type
- Suitable for titration, mixing, culturing
b) Wide Neck
- Allows easy addition of solids
- Preferred in industrial and chemical labs
c) Conical Flask with Stopper
- Comes with a glass or plastic stopper
- Suitable for storing prepared solutions
d) Conical Flask with Screw Cap
- Used for microbiology, PCR, and sterile applications
Common Sizes of Conical Flasks
Typical sizes include:
- 25 ml
- 50 ml
- 100 ml
- 150 ml
- 250 ml
- 500 ml
- 1000 ml (1 litre)
- 2000 ml (2 litre)
- 5000 ml (5 litre)
Laboratories choose sizes depending on the volume of solution needed for experiments.
Conical Flask Uses (Most Important Applications)
The list of conical flask uses is extensive because the design supports both simple and advanced laboratory processes.
1. For Mixing Solutions
Because of its narrow neck and wide base, the conical flask is perfect for swirling chemicals without spilling them. It is heavily used for:
- Preparing chemical solutions
- Diluting acids and bases
- Mixing reagents
2. For Heating Chemicals
Borosilicate flasks resist high temperatures. You can place the conical flask on:
- Bunsen burners
- Hot plates
- Heating mantles
It is used for boiling, sterilizing, and evaporating liquids safely.
3. In Titrations
In titration experiments:
- The conical flask holds the analyte
- The solution from a burette drips into it
- Its shape minimizes splashing during swirling
This is one of the most common conical flask uses in schools and colleges.
4. In Microbiology
Microbiologists use the flask for:
- Growing cultures
- Shaking incubation
- Preparing media
Flasks with screw caps or cotton plugs are preferred for sterile environments.
5. For Storage of Chemicals
Conical flasks with stoppers or caps help in temporary storage of:
- Buffers
- Culture media
- Prepared reagents
- Sample solutions
6. In Filtration
The conical flask is used with:
- Funnels
- Filter papers
- Buchner funnels (for vacuum filtration)
The narrow neck ensures secure funnel placement.
7. For Crystallization and Evaporation
Its shape allows slow evaporation, making it suitable for:
- Crystallizing chemicals
- Concentrating solutions
8. In Industrial and Quality Testing
Used for:
- Testing water and wastewater
- Checking chemical purity
- Industrial research and analysis
Advantages of a Conical Flask
- Minimizes spillage
- Easy to swirl solutions
- Safe for heating
- Stands stable on benches
- Good for growing cultures
- Compatible with funnels
- Available in many sizes
- Suitable for both liquid and solid chemicals
Difference Between Conical Flask and Beaker
Feature Conical Flask Beaker Shape Conical with narrow neck Cylindrical with wide mouth Mixing Best for swirling without spilling Easy to spill Heating More uniform heating Slower heating Filtration Secure funnel placement Funnel may slip Applications Titration, culturing, heating General mixing & measuring
Conical Flask Price in India (Complete Breakdown)
The conical flask price depends on:
- Size (ml)
- Material (glass or plastic)
- Brand
- Sterility
- Stopper or screw cap availability
Below is an estimated price guide (India):
Glass Conical Flask Price
Size Approx. Price (INR) 50 ml ₹40 – ₹80 100 ml ₹50 – ₹120 250 ml ₹70 – ₹150 500 ml ₹90 – ₹250 1000 ml ₹150 – ₹350 2000 ml ₹300 – ₹750 5000 ml ₹600 – ₹1500 Plastic Conical Flask Price
Size Approx. Price (INR) 50–100 ml ₹40 – ₹100 250 ml ₹80 – ₹150 500 ml ₹120 – ₹200 1000 ml ₹150 – ₹300 Special Conical Flasks
Type Approx. Price With Screw Cap ₹200 – ₹900 With Stopper ₹120 – ₹450 Sterile Conical Flask ₹300 – ₹1200 Prices vary by brand such as Borosil, Glass Agencies, Labix, Micro Lab Equipment, and others.
How to Choose the Right Conical Flask
1. Choose Material Carefully
- Glass: For heating and chemical reactions
- Plastic: For unbreakable and microbial work
2. Select the Right Size
Pick a flask with at least 30% extra capacity for safe mixing.
3. Check for Graduation Accuracy
Choose ISO-certified brands for precise measurement markings.
4. Decide if You Need a Stopper
For storage or microbiological use, choose:
- Screw caps
- Glass stoppers
- Cotton plugs
5. Consider Heat and Chemical Resistance
Look for:
- Borosilicate 3.3 glass
- Autoclavable PP plastic
Maintenance & Safety Tips
- Do not heat plastic flasks unless they are autoclavable
- Avoid direct flame for thin-glass flasks
- Use gloves while handling hot flasks
- Clean immediately after use
- Check for cracks before heating
- Use brushes to clean narrow necks
- Store in safe racks to prevent breakage
Wrapping Notes
A conical flask is one of the most adaptable instruments in any laboratory. Its design is simple yet very effective. It is essential in mixing, heating, culturing, filtering, and storing solutions safely for school experiments and complex chemical studies alike.
Knowing the conical flask diagram, the construction, and the different conical flask involve the cost of conical flasks, all inform students, lab technicians, and researchers in the decision of which model is right for their purpose.
Frequently Asked Questions
What is a conical flask used for?A conical flask is mainly used for mixing, heating, storing, and culturing liquids in laboratories. Its narrow neck and conical shape allow safe swirling without spilling, which makes it ideal for titration experiments, preparing chemical solutions, growing microbial cultures, filtration, and heating on burners or hot plates.
Why is it called an Erlenmeyer flask?A conical flask is also called an Erlenmeyer flask because it was invented in 1860 by German chemist Emil Erlenmeyer. The name honors his contribution to laboratory glassware design.
What is the price of a conical flask in India?The price of a conical flask in India depends on size, material, and brand. Approximate price range:
50–100 ml: ₹40 – ₹120
250 ml: ₹70 – ₹150
500 ml: ₹90 – ₹250
1000 ml: ₹150 – ₹350
2000 ml: ₹300 – ₹750
5000 ml: ₹600 – ₹1500
Screw-cap or sterile flasks: ₹200 – ₹1200
Prices vary by brand such as Borosil, Labix, and other laboratory suppliers.What are the main parts of a conical flask?A conical flask has five main parts: the narrow neck (for gripping and swirling), the shoulder (for controlled pouring), the conical body (for mixing), the flat base (for stability and heating), and graduation marks (for approximate volume measurement).
-
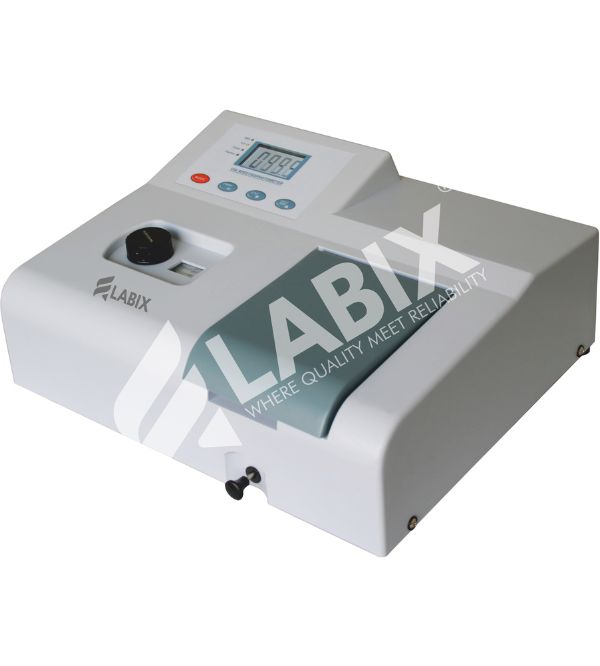
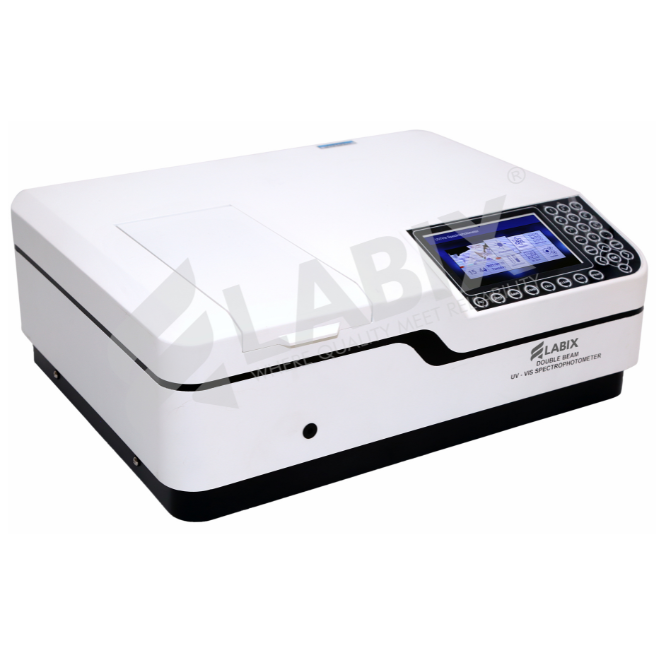
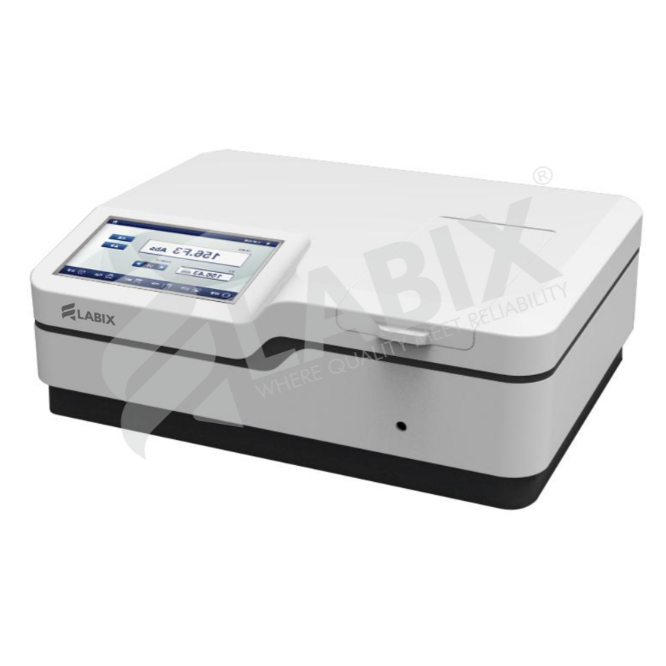
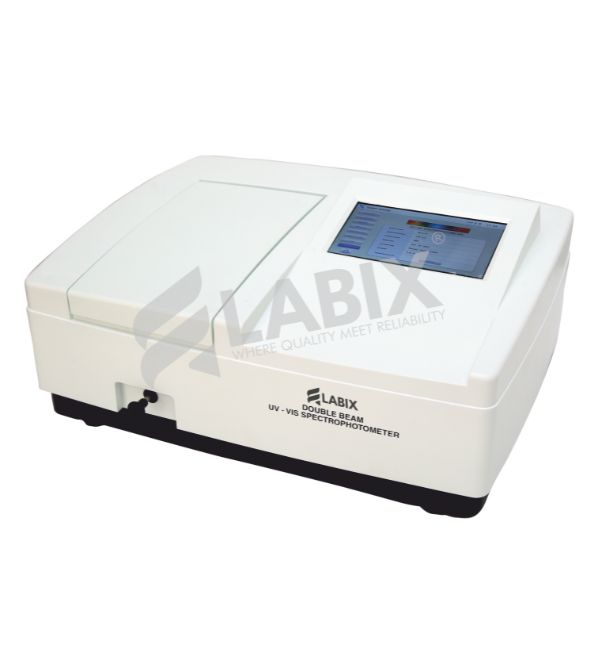
Spectrophotometers: Working Principle, Types, and Applications
Overview
A spectrophotometer can be defined as an instrument used to measure the amount of light absorbed by a sample. It works by shining a light beam through the sample and comparing the amount of light before and after it contacts the sample. It measures the absorbance and transmittance of light. Absorbance is the measure of how much light is absorbed by the sample. Transmittance is the measure of how much light passes through the sample and reaches the light detector.
Explore Spectrophotometers Series
Spectrophotometers are relied on in research and labs in chemistry, biology, and the pharmaceutical industry to determine the purity of a compound, identify a compound, or observe the progress of a reaction over time. UV-Vis spectrophotometers are popular in labs for analytical testing because they provide almost instantaneous readings and have a potential wavelength range from the ultraviolet spectrum, to visible light.
They are used for drug analysis, enzyme reactions, water quality testing and color measurement in food and textile industries.
Diagram of Spectrophotometer
Working Principle of Spectrophotometer
A spectrophotometer sends a beam of light through a sample. The sample absorbs some wavelengths and allows others to pass. The detector calculates how much light is absorbed and converts it into numerical data. This gives information about the substance in the sample.
Basic Components
• Light source: Xenon, Deuterium or Tungsten lamps are used to produce stable light.
• Monochromator: A prism or diffraction grating separates light into specific wavelengths.
• Sample holder or cuvette: Holds the liquid or solution being tested. Usually made of quartz or glass.
• Detector: Photodiode or photomultiplier tube detects the light after it passes through the sample.
• Display or software: Shows results in absorbance or transmittance. Data can be stored or exported for reports.Step-by-Step Working
• Light is emitted from the lamp.
• The monochromator selects a specific wavelength.
• Light passes through the sample in the cuvette.
• The detector measures the transmitted light.
• The device calculates absorbance using the Beer-Lambert law. Results are shown on the display or software.Example: In a UV-Vis spectrophotometer, you place a chemical solution in a quartz cuvette. You select a wavelength, such as 280 nm. The light passes through the solution. If the solution absorbs light at this wavelength, the detector records a drop in intensity. The spectrophotometer calculates the absorbance and displays the concentration based on a standard curve.
Types of Spectrophotometers
Below are the top 6 important spectrophotometers by LABIX Industries.
- Double Beam UV-Vis Spectrophotometer Xenon Lamp
- Double Beam UV-Vis Spectrophotometer Touch Screen
- Double Beam UV-Vis Spectrophotometer Variable Bandwidth with 8 Cell Changer
- Single Beam UV-Vis Spectrophotometer
- Single Beam UV-Vis Spectrophotometer with Professional Scanning Software
- Visible Spectrophotometer Microprocessor Based
Each type has its use based on accuracy, light source and data needs.
Based on Beam Type
- Single Beam Spectrophotometer
A single beam spectrophotometer sends one light path through the sample. You measure the blank first, then the sample. It is simple, low cost and suited for teaching labs and small chemical tests. Example: Single Beam UV-Vis Spectrophotometer by LABIX Industries.
2. Double Beam Spectrophotometer
A double beam spectrophotometer splits light into two paths, one through the sample and one through a reference. This setup gives stable readings and reduces errors from light source fluctuations. Example: Double Beam UV-Vis Spectrophotometer with Xenon lamp by LABIX Industries.
Based on Wavelength Range
1. UV Spectrophotometers
Used for ultraviolet region between 200 to 400 nm. Ideal for protein, nucleic acid and pharmaceutical testing. Allows analysis of substances that absorb UV light.
2. Visible Spectrophotometers
Measures light in the visible range from 400 to 700 nm. Used in food color analysis, textile dye testing and water analysis. Suitable for colored solutions and routine laboratory work.
3. UV-Visible UV-Vis Spectrophotometers
Covers both UV and visible range from 200 to 700 nm. Most common in research and industry. Used for chemical concentration, enzyme reactions and quality control. LABIX double beam models offer touch screen and variable bandwidth.
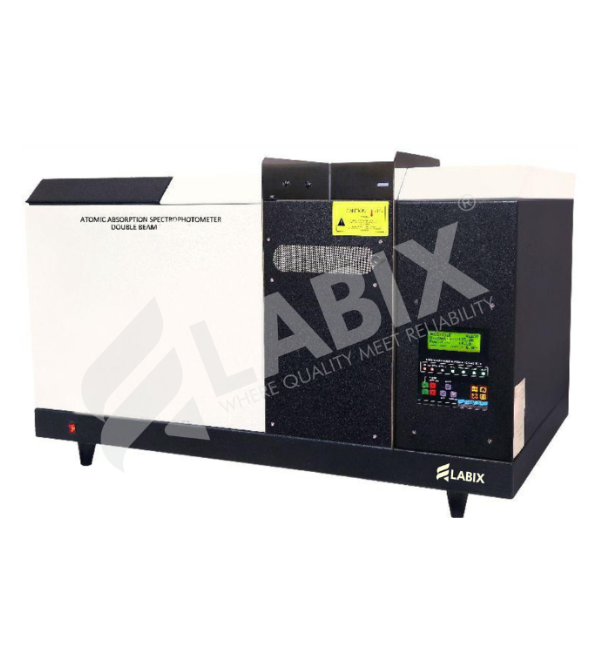
4. Atomic Absorption Spectrophotometers AAS
Used to measure metal ions in samples by atomizing them. Works in flame or graphite furnace. Used in environmental testing, food safety and metal analysis. Detects traces of lead, copper, zinc and more.
Spectrometer vs Spectrophotometer
Feature Spectrometer Spectrophotometer Purpose Measures the intensity of light at different wavelengths Measures how much light a sample absorbs or transmits Sample interaction Light is not passed through a sample Light passes through a sample Output Spectrum of light only Absorbance or transmittance values plus spectrum Use case Optical analysis, wavelength separation Chemical concentration, solution analysis Example Measuring emission of light sources Measuring protein concentration in a solution In simple terms:
A spectrometer only separates and detects light.
A spectrophotometer does more, it uses a spectrometer to measure how much light a sample absorbs.Function of Spectrophotometers
In Chemical Laboratories
• Measure concentration of solutions using the Beer-Lambert law
• Monitor reaction progress by checking absorbance changes over time
• Identify unknown substances from their absorbance peaks
• Commonly used in titrations, enzyme kinetics and colorimetric testsIn Pharmaceutical Industry
• Test drug purity by comparing sample absorbance with standards
• Check API concentration in tablets and syrups
• Used in dissolution testing and stability studies
• Helps maintain compliance with pharmacopeia standardsIn Food and Beverage Industry
• Measure color intensity in beverages, oils and juices
• Detect additives, contaminants or adulteration
• Used in sugar analysis, wine testing, and milk quality checks
• Supports routine quality control in factoriesIn Educational and Research Institutions
• Used to teach students about light, absorbance and chemical analysis
• Helpful for small research projects and lab experiments
• Affordable single beam models are common in universitiesIn Environmental Studies
• Used for water testing to measure nitrate, phosphate, or heavy metals
• Monitor pollution levels in lakes, industrial discharge and drinking water
• Helps assess effects of chemicals on the environment
Advantages of Spectrophotometers
• Fast results
• Non-destructive testing
• Works with liquids, transparent solids and solutions
• Digital data output and USB or software connectivity
• Suitable for chemical, food, pharma, textile and research labs
FAQs
1. What is the main use of a spectrophotometer?
To measure how much light a sample absorbs and to calculate the concentration of substances in that sample.2. What is the difference between single beam and double beam spectrophotometers?
Single beam measures blank and sample separately. Double beam measures sample and reference at the same time, giving more stable readings.3. Can spectrophotometers measure color intensity?
Yes. Visible and UV-Vis spectrophotometers measure color intensity in liquids like juice, wine, dye or water samples.4. What is the typical wavelength range of a UV-Vis spectrophotometer?
Usually from 200 to 800 nanometers. UV region is 200 to 400 nm. Visible region is 400 to 700 nm.5. How often should a spectrophotometer be calibrated?
Calibration should be done regularly. Labs usually calibrate daily or weekly depending on usage. Calibration ensures accurate readings.
At the End
Spectrophotometers are essential for measuring absorbance and concentration in laboratories. You use them in chemistry, pharmaceuticals, food analysis, water testing and research. They provide quick, repeatable results and handle different types of samples.
LABIX Industries offers a selection of UV-Vis and Visible spectrophotometers with features like touch screens, Xenon lamps, scanning software and ISO-certified manufacturing. Their instruments support accurate testing in labs, industries and educational institutes.
-
Functions of Beakers: Why Every Laboratory Needs This Essential Tool
Understanding the Beaker
A beaker is a simple yet vital tool in any laboratory. It is used for mixing, heating, and measuring liquids. The shape is cylindrical with a flat base and a small spout for pouring. The beaker meaning is clear—it is designed to make experiments safe and efficient.
Most beakers are made of borosilicate glass or plastic. Each type serves a different purpose depending on your experiment. The glass beaker is heat resistant and chemical resistant, making it perfect for both school and industrial labs.
When you handle a beaker, you interact with one of the oldest and most trusted tools in scientific study. Every scientist, student, and researcher uses it to prepare, test, or heat materials.
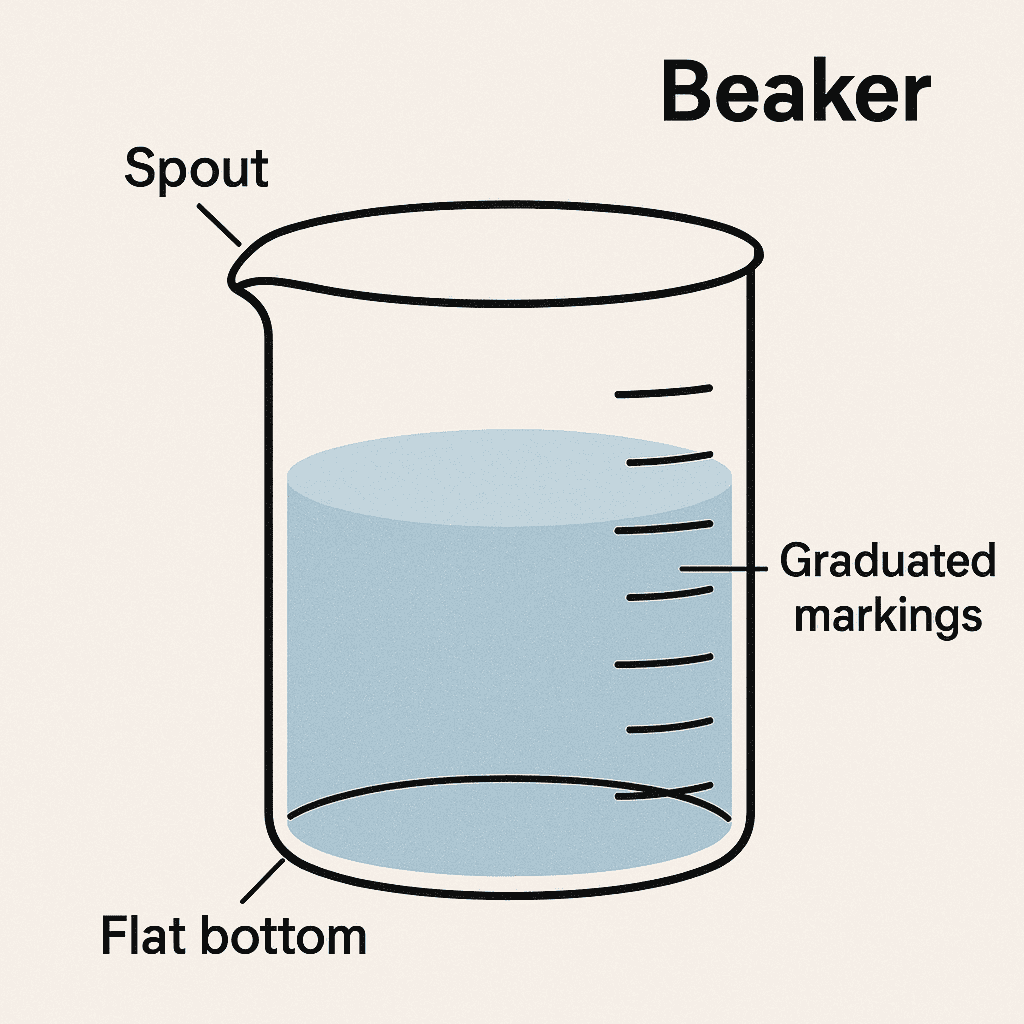
The Structure of a Beaker
A beaker looks simple but every part has a purpose. Understanding each part helps you use it properly.
- Mouth: Wide for easy mixing and adding chemicals.
- Spout: Allows controlled pouring without spills.
- Graduations: Marked lines on the side for measuring volume.
- Base: Flat bottom for stability on the lab bench.
- Material: Usually glass, plastic, or metal.
Each of these parts contributes to safety, accuracy, and comfort during lab work.
Beaker Diagram
A beaker diagram helps students and beginners identify these parts visually. In a beaker diagram, you can see labels showing where the spout, graduations, and base are located. It simplifies learning and helps you remember the structure during experiments.
Teachers use the beaker diagram in science books and classroom charts. It’s one of the first things introduced in chemistry lessons.
Types of Beakers
Every laboratory needs multiple types of beakers. The material, shape, and purpose determine which one you should choose.
1. Glass Beaker
The glass beaker is the most common type. It resists heat and chemical corrosion. You can heat it directly on a Bunsen burner or hot plate. It also provides clear visibility of liquids during reactions.2. Plastic Beaker
Used for mixing or measuring non-corrosive liquids. Plastic beakers are lightweight and ideal for quick classroom experiments.3. Low Form Beaker
Short and wide. Used for mixing and heating.4. Tall Form Beaker
Long and narrow. Used when precise volume measurement is needed.5. Beakers with Lids
These prevent contamination and evaporation. Useful for long-term chemical storage.
Beaker Sizes and Measurement
Beakers come in many sizes ranging from 10 ml to 5000 ml. The graduations on the side show approximate volumes. For accurate measurements, always use a measuring cylinder.
Still, beakers are good for quick volume checks, especially during solution preparation.
When you study a beaker diagram, you’ll notice the measurement lines are evenly spaced, making it easier to estimate the volume at a glance.
Beaker Meaning in Laboratory Context
The beaker meaning goes beyond being a simple container. It represents practicality and consistency in lab work. Scientists use it to create chemical reactions safely, mix solutions smoothly, and observe color changes easily.
It’s used across fields such as chemistry, biology, physics, and medical testing. Whether it’s dissolving salts or heating water, a beaker supports almost every stage of an experiment.
Common Uses of a Beaker
Beakers serve multiple roles in laboratories. Here are the most practical uses:
- Mixing chemical solutions
- Heating liquids on burners
- Measuring approximate volumes
- Preparing reagents or samples
- Collecting and transferring liquids
- Cooling heated solutions
- Holding samples during reactions
A glass beaker is preferred when heat or chemicals are involved. Plastic beakers work best for low-risk mixing tasks.
How Beakers Are Used in School Labs
In school laboratories, a beaker helps students understand basic science. Teachers demonstrate reactions, such as dissolving salt in water or mixing acids and bases.
Students often draw beaker drawing diagrams in lab manuals. The beaker drawing helps them identify parts and label structures correctly during experiments.
Beaker Drawing and Educational Value
A beaker drawing helps new learners grasp the tool’s structure and function. It visually shows where the graduations and spout are located. Teachers use these drawings to explain pouring techniques, measurement marking, and safe handling.
Students can also use a beaker drawing to compare different sizes or materials. It’s a simple learning exercise but highly effective.
Value of Beaker Images
A beaker image helps you visually recognize the difference between beakers and other containers like flasks or test tubes. By studying a beaker image, you can easily remember its shape and proportions.
Laboratory catalogs, online stores, and textbooks often include clear beaker image references. They guide students in selecting the right beaker size and type for specific experiments.
Risk Management Procedures While Using Beakers
Safety is a must in every laboratory. Follow these rules when handling beakers:
- Always wear gloves and safety goggles.
- Do not heat a glass beaker with cracks or chips.
- Use tongs for handling hot beakers.
- Avoid filling liquids to the brim. Leave space for mixing.
- Clean beakers immediately after use.
- Store dry beakers upside down to avoid contamination.
These small steps prevent spills, burns, and chemical exposure.
Cleaning and Upkeep
Cleaning a beaker properly extends its life and ensures reliable results.
Step 1: Rinse with tap water after each use.
Step 2: Use a brush for tough residues.
Step 3: Wash with mild detergent and rinse with distilled water.
Step 4: Air-dry or place in a drying cabinet.Avoid using metal scrubbers on glass beakers to prevent scratches. For plastic beakers, use soft sponges only.
Advantages of Using Beakers
A beaker is preferred in labs for many reasons:
- Simple design
- Easy to clean
- Suitable for multiple uses
- Heat and chemical resistant (for glass types)
- Inexpensive and widely available
- Clear markings for measurements
This combination of benefits makes it a staple item in every laboratory worldwide.
Why Glass Beakers Are Popular
The glass beaker is a global standard in scientific labs. Borosilicate glass is resistant to sudden temperature changes, preventing breakage during heating or cooling. It also provides transparency, allowing users to see reaction progress directly.
Unlike plastic, a glass beaker does not absorb stains or odors, ensuring pure results every time.
Beakers in Chemical Reactions
In chemistry labs, a beaker plays a role in reaction control. It helps you monitor chemical interactions safely. You can heat, stir, and mix substances while observing changes in color or temperature.
Beakers are often paired with stirring rods and thermometers. When used correctly, they maintain safety and consistency during experiments.
Beakers in Biology Labs
In biology, beakers are used for preparing culture media, washing biological samples, and mixing solutions. The beaker meaning here connects directly to maintaining sterile and clean liquid handling.
Researchers use glass beakers because they withstand autoclaving, a process that sterilizes equipment under high heat and pressure.
Beakers in Physics and Environmental Science
Physics labs use beakers to hold water for thermal experiments or density tests. Environmental scientists use them to collect and test soil or water samples. The beaker diagram often appears in their reports to describe the experimental setup.
Choosing the Right Beaker
When selecting a beaker, consider these points:
- Purpose: Heating, mixing, or storing?
- Material: Choose glass beaker for heat, plastic for light use.
- Size: Use smaller beakers for precision, larger for mixing.
- Graduations: Ensure they are visible and clear.
This approach ensures the beaker fits your experimental needs.
Beaker Sets for Labs
Schools and institutions often buy beaker sets. These sets include multiple glass beakers of various sizes, helping students learn about volume and proportion.
Each beaker image in catalogs displays size and capacity details. It allows teachers to plan practical experiments effectively.
How to Handle Beakers Safely During Heating
Heating a beaker requires care. Follow these practices:
- Place the beaker on a wire gauze or tripod stand.
- Never heat a beaker directly on a flame without support.
- Stir liquids while heating to distribute temperature evenly.
- Use tongs or gloves to move the glass beaker.
Proper handling keeps you and your lab environment safe.
Beaker Drawings in Science Textbooks
The beaker drawing is not only a diagram but a part of basic science education. Students use it to understand structure and to label parts during exams. Textbooks show both beaker diagram and beaker image examples to strengthen learning through visuals.
Beakers and Other Lab Equipment
A beaker often works with other tools:
- Test tubes
- Pipettes
- Funnels
- Measuring cylinders
- Conical flasks
Each has a unique function, but the beaker remains the most frequently used container. It supports almost every process in liquid handling.
Digital Learning and Beaker Images
Today, many science apps and e-learning platforms include beaker image libraries. These help students study from home. By clicking on a beaker image, users can zoom in, rotate, and explore its parts interactively.
Digital beaker diagrams also simplify online teaching, helping instructors explain practical topics through visuals.
Summary of Beaker’s Importance
A beaker is the foundation of every laboratory. Its design, structure, and versatility make it indispensable for research and education. From the beaker diagram to beaker drawing and beaker image, every representation strengthens understanding.